Heavenly Red Velvet Oreo Cheesecake Recipe

This red velvet Oreo cheesecake is a mix of luxury and ease. It combines a creamy red cheesecake with the crunch of Oreo cookies. It’s perfect for any celebration or a cozy weekend treat. With just 38 minutes of work, you’ll make a dessert that everyone will love.
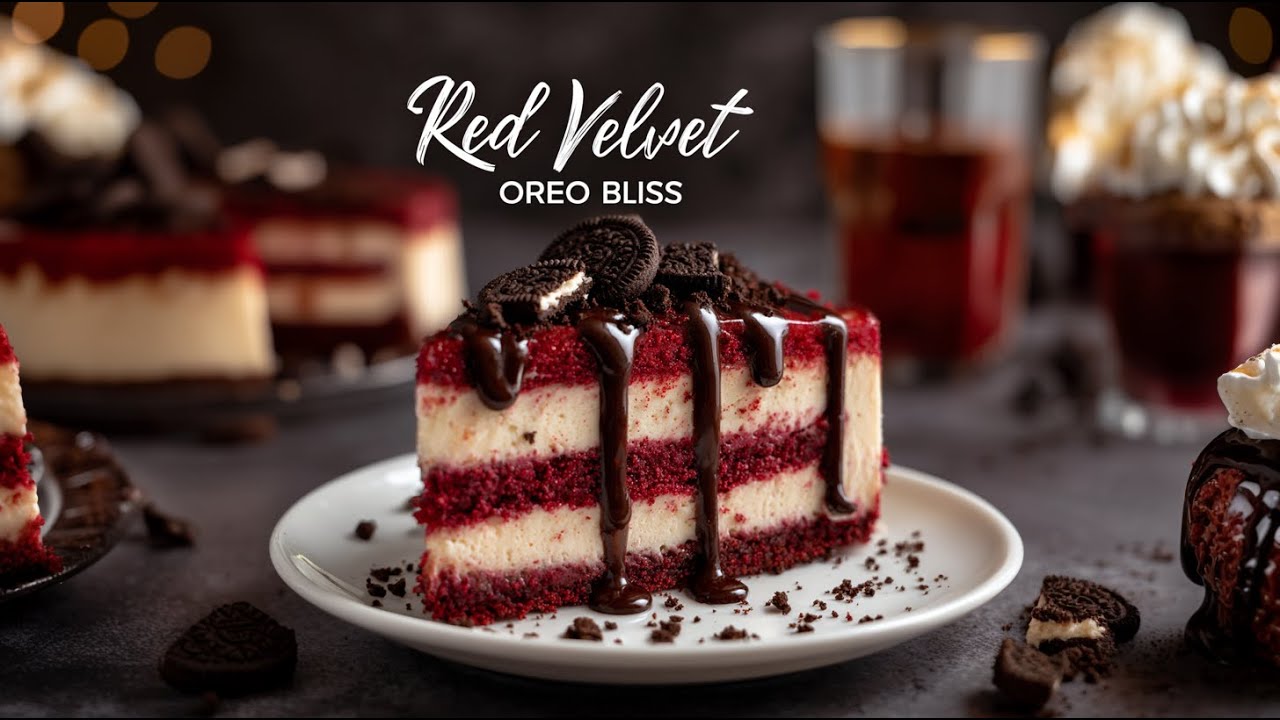
Imagine a red velvet Oreo cheesecake with a shiny red center in an Oreo crust. Each bite is a mix of smooth cheesecake and crunchy cookies. It’s not just a recipe; it’s a way to enjoy a special treat. The colors and flavors are all about making a big impact.
Key Takeaways
- Uses 12 Oreo cookies and 8 oz cream cheese for a balance of crunch and creaminess.
- Prep takes 20 minutes, with 38 minutes total baking time for 12 servings.
- Highlights vibrant red coloring from gel food dye and a 9×9-inch pan for even baking.
- Stores up to 5 days in the fridge or freezes for 3 months for future gatherings.
- Perfect for birthdays, using toppings like strawberries or chocolate shavings for extra flair.
This red velvet Oreo cheesecake is a mix of luxury and ease. It combines a creamy red cheesecake with the crunch of Oreo cookies. It’s perfect for any celebration or a cozy weekend treat. With just 38 minutes of work, you’ll make a dessert that everyone will love.
Imagine a red velvet Oreo cheesecake with a shiny red center in an Oreo crust. Each bite is a mix of smooth cheesecake and crunchy cookies. It’s not just a recipe; it’s a way to enjoy a special treat. The colors and flavors are all about making a big impact.
Key Takeaways
- Uses 12 Oreo cookies and 8 oz cream cheese for a balance of crunch and creaminess.
- Prep takes 20 minutes, with 38 minutes total baking time for 12 servings.
- Highlights vibrant red coloring from gel food dye and a 9×9-inch pan for even baking.
- Stores up to 5 days in the fridge or freezes for 3 months for future gatherings.
- Perfect for birthdays, using toppings like strawberries or chocolate shavings for extra flair.
Introduction to Red Velvet Oreo Cheesecake
Discover the perfect mix of two beloved treats in the red velvet dessert. This Oreo cheesecake recipe brings together timeless flavors. It’s a dessert that’s both indulgent and traditional. Let’s explore its story and why it’s a hit.
The Origin of Red Velvet Cake
Red velvet cake started in Southern U.S. kitchens in the 1920s. It’s known for its bright red color and moist texture. The original recipe used buttermilk for tang and red food coloring for color.
Today, it combines cocoa powder for a deeper chocolate taste. This keeps its signature red color.
Why Oreos and Cheesecake Make a Perfect Pair
- Crunch vs. Cream: Oreo’s crunchy cookie contrasts with cheesecake’s smooth texture.
- Flavor Fusion: Cocoa in Oreos matches the red velvet’s chocolate, adding depth.
- Visual Appeal: Crushed Oreos add a rustic texture, making each bite exciting.
What Makes This Recipe Special
| Traditional Cheesecake | Red Velvet Oreo Cheesecake |
|---|---|
| Simple vanilla or chocolate variations | Red velvet’s cocoa adds complexity |
| Creamy texture alone | Oreo crumbles create textural contrast |
| Plain toppings | Optional Oreo swirls and chocolate garnishes |
This recipe uses a 3-layer technique. It starts with a Graham cracker-Oreo crust. Then, a red velvet-infused cheesecake base. It ends with a drizzle of melted Oreo filling.
It focuses on quality ingredients, like full-fat cream cheese, for a smooth finish. This cheesecake is perfect for any occasion. It’s a twist on classic baking that’s both easy and impressive.
Essential Ingredients You’ll Need
Before you start making the red velvet Oreo cheesecake, get these key ingredients. They’re vital for a delicious cream cheese dessert. Good ingredients mean rich taste and smooth texture.
- Oreo Cookies: 3 cups finely crushed (about 26 cookies) form the base of the iconic crust.
- Unsalted Butter: 6 tbsp melted binds the crust and prevents dryness.
- Cream Cheese: 32 oz softened at room temperature ensures a creamy foundation.
- Sour Cream: ¾ cup adds tanginess without overpowering the red velvet Oreo cheesecake.
- Vanilla Extract: 1 tsp enhances sweetness without masking other flavors.
- Sugar & Cocoa: 1 cup granulated sugar and ¼ cup Dutch-processed cocoa for authentic red velvet depth.
| Ingredient | Role |
|---|---|
| Red Food Gel Dye | 1 tsp achieves vibrant red velvet hue |
| Heavy Cream | ½ cup lightens filling texture |
| Eggs | 4 room-temperature eggs ensure even baking |

Pro tip: Use full-fat cream cheese for silkiness—substitute with Neufchatel if needed. Opt for gel food coloring to avoid extra liquid. Always bring ingredients to room temperature before mixing.
Kitchen Tools Required for This Recipe
Every tool in your kitchen is important for making this rich red velvet Oreo cheesecake. Whether you’re a pro or just starting, the right tools make your easy dessert recipes perfect every time. Here’s what you need to begin baking these sweet treats.

- 9-inch springform pan (critical for even baking)
- Mixing bowls (stainless steel or glass work best)
- Wire cooling rack (for safe cooling after baking)
- Stand mixer or hand mixer (for creaming ingredients)
- Whisk and silicone spatula (to avoid lumps)
Optional Tools That Simplify Baking
These items make the process smoother:
- Food processor (grinds Oreos to perfect crumbs)
- Piping bag with star tip (for decorative toppings)
- Cheesecake shield (prevents edge cracking)
- Instant-read thermometer (checks filling temperature)
- Spring-loaded measuring spoons
Don’t have these tools? No problem. Use a regular baking dish instead of a springform pan. Crush Oreos by hand if you don’t have a processor. The most important thing is to mix gently and measure correctly to avoid cracks. With these tools, you’re all set to make one of the most delicious sweet treats out there!
Making the Perfect Oreo Crust
The base of any Oreo cheesecake recipe is key. A good Oreo crust is essential for a perfect, easy dessert recipe. Here’s how to make a crust that’s both crunchy and holds together well.
Crushing Oreos to the Right Consistency
- Food processor method: Pulse 32 Oreos until they’re fine crumbs. Be careful not to overdo it to avoid a sandy texture.
- Plastic bag technique: Put Oreos in a resealable bag. Use a rolling pin to crush them until they’re mostly crushed but not too fine.
- Manual crushing: Break cookies by hand and sift to remove big pieces. This leaves small chunks for texture.
Crumb consistency is important. If they’re too fine, add 2-3 whole Oreos for texture. If they’re too chunky, grind them some more.

Adding Butter and Setting Your Crust
Melt 5 tablespoons of salted butter and mix it with the Oreo crumbs and 1 tablespoon of sugar. Press the mixture into a 9-inch springform pan using a measuring cup. Bake at 325°F for 10 minutes until it’s lightly browned. Let it cool completely before adding the filling. For extra stability, chill the crust in the freezer for 30 minutes before adding the filling.
Pro tip: Refrigerate the pan after baking to prevent it from getting soggy. This step helps your easy dessert recipes keep their shape. Once baked, the crust can handle the cheesecake’s weight while keeping the Oreo flavor.
Creating the Red Velvet Cheesecake Filling
Making the homemade red velvet cheesecake filling needs care. Begin with cream cheese at room temperature to avoid lumps. In a mixer bowl, mix 1.5 cups of sugar and softened cream cheese until smooth. Then, add 4 eggs one at a time, mixing just until they’re fully incorporated.
Stir in ¼ cup cocoa powder and ½ cup sour cream. Slowly add 1 bottle of red food coloring at low speed. This helps get the perfect color without mixing too much.
- Cream together softened cream cheese and sugar until smooth.
- Beat in eggs one at a time to prevent curdling.
- Whisk cocoa powder and sour cream into the batter.
- Gradually add red food coloring until the desired vibrance. Stop mixing once the color is even.
“The secret to a flawless filling? Mix ingredients in this exact order. Cocoa comes before eggs to prevent streaks.”
Pro tip: After mixing, use a spatula to scrape down the bowl edges. This prevents air bubbles that can cause cracks. Mix on medium speed in a stand mixer for no more than 2 minutes.
| Natural Color Alternatives | Benefits | How to Use |
|---|---|---|
| Beetroot Puree | Natural sweetness | Blend ½ cup puree into batter |
| Freeze-Dried Strawberries | Strong pigment | Blend ½ cup puree into the batter |
| Pomegranate Juice | Deep red shade | Add 2-3 tbsp gradually |
For cream cheese dessert perfection, chill the batter in the fridge for 30 minutes before baking. This helps firm up the ingredients and reduces the chance of cracks. Use gel-based dyes for the best color results, as liquid dyes can thin out the texture.

How to Incorporate Oreos Into Your Cheesecake
Adding Oreos to your red velvet oreo cheesecake makes them special, sweet treats with different textures. You can choose how you want the Oreos to add to your dessert.
Chunky vs. Finely Crushed Oreos
For a bold crunch, mix in 15 chopped Oreos into the batter. These big pieces add fun surprises with every bite. To prevent them from sinking, mix them in gently after mixing the wet ingredients.
For a smoother texture, use finely crushed Oreos (½ cup). They blend well into the batter, adding a bit of texture without overpowering the red velvet taste. Crush them evenly with a food processor.
Layering Techniques for Maximum Flavor
Try layering to bring out both flavors. Here are some ways to do it:
- Vertical Layers: Spread a cheesecake layer, then top with crushed Oreos. Repeat until you end with a cheesecake layer on top.
- Swirl Pattern: Use a knife to swirl the batter and Oreos before baking. This makes beautiful marbled swirls.
- Top Layer: Press whole Oreos into the surface before baking, or drizzle melted chocolate over them after baking for a stunning finish.
After baking, let the cheesecake cool a bit. Press whole Oreos into the surface while it’s warm. They’ll stick to the batter. Follow the storage instructions for the best taste.
Baking Tips for a Crack-Free Red Velvet Oreo Cheesecake
Creating a homemade red velvet cheesecake without cracks is all about following the right steps. Here are some tips to help you achieve a smooth and stunning dessert.
Water Bath Method Explained

First, wrap your springform pan in aluminum foil to keep water out. Then, put it in a roasting pan filled with hot water, up to ¼ of the pan’s height. This water bath (bain-marie) helps keep the cheesecake’s temperature steady, protecting it from oven heat changes.
Temperature Guidelines
Bake at 350°F for the first 15 minutes. Then, lower the oven to 320°F and bake until the edges are set but the center is slightly jiggly. Avoid overbaking, as it can dry out and cause cracks. Don’t open the oven too often.
Cooling Process to Prevent Cracks
- Turn off the oven, crack the door open 1 inch, and let the cheesecake cool inside for 1 hour.
- Let it cool at room temperature for 2 hours before refrigerating it for 7+ hours. Sudden cooling can cause cracks.
Be patient during the cooling process. Rushing can lead to a cracked cheesecake. For the best results, bake the chocolate layer with ¾ tsp baking powder and ½ cup cocoa powder. Following these steps will help you create a flawless homemade red velvet cheesecake that will impress everyone.
Decadent Toppings and Garnishes
Enhance your decadent desserts with creative toppings. Start by piping whipped cream into rosettes with a star tip. Then, sprinkle with cocoa nibs or edible gold flakes for luxury. For a bold finish, melt white chocolate and drizzle it over chilled cheesecake slices in zigzag patterns.

- Spread a thin layer of raspberry jam under frosting for a tangy contrast to the rich, sweet treats.
- Crush 10–12 Oreos and mix with melted dark chocolate for a crunchy garnish.
- Top with fresh berries or toasted coconut for a pop of color and texture.
Try seasonal twists: swirl peppermint extract into frosting during holidays or scatter edible petals for spring. A 2-cup batch of chocolate whipped cream (made with ½ cup powdered sugar and ¼ cup cocoa) adds extra indulgence. Let the layers set in the fridge for at least 2 hours before serving to ensure toppings hold their shape.
Troubleshooting Common Cheesecake Problems
Making a perfect Oreo cheesecake recipe needs careful attention. Don’t worry if your homemade red velvet cheesecake isn’t perfect. Most issues can be fixed or hidden. Here are tips for three common problems.
Fixing a Soggy Crust
A soggy base usually means the crust wasn’t baked enough. Pre-bake it for 10 minutes at 350°F before adding the filling. Mix 1.5 cups crushed Oreos with ½ cup melted butter for a strong base. Let it cool completely before adding layers to stop moisture from getting in.
Solutions for Sunken Centers
- Tap the pan gently after pouring the filling to get rid of air bubbles.
- Use a water bath to keep the heat steady while baking.
- Bake at 325°F for 40-45 minutes—take it out when the edges are set but the center is a bit jiggly.
Remedies for Overbaked Cheesecake
If your cheesecake is too dry, cover up the issues with toppings like:
- Fresh berries or whipped cream to add moisture.
- A drizzle of red velvet frosting over cracks.
- Chill for 4 hours after baking to firm up without overcooking.
For the next bake, lower the oven temperature by 25°F and check for doneness early. Small flaws can be hidden with a bit of creativity!
Make-Ahead and Storage Instructions
Learning how to store your red velvet dessert is key to keeping it fresh and tasty. These tips make it one of the easiest desserts to prepare ahead of time.
Freezing Your Cheesecake
First, wrap the cooled cheesecake in parchment paper and then in aluminum foil. Put it in an airtight container or freezer bag. It can stay frozen for up to 3 months.
To thaw, move it to the fridge 24 hours before you plan to serve it. Remember, freeze without toppings to prevent texture changes. Add toppings just before serving.
- Whole cheesecakes: Wrap in 3 layers of plastic wrap before freezing
- Slices: Freeze individually on a tray, then store in a freezer-safe container
Proper Refrigeration Guidelines
After baking, refrigerate your cheesecake uncovered for 1 hour. Then, cover it tightly with plastic wrap. Store it in the fridge for up to 5 days.
Keep it away from strong-smelling foods to avoid absorbing odors.
| Storage Method | Freezing | Refrigeration |
|---|---|---|
| Storage Time | Up to 3 months | 5 days max |
| Thawing | 24 hours in fridge | Chill 8+ hours before serving |
| Texture Tips | Wrap tightly to prevent freezer burn | Avoid opening the container too often |
Note: If mold appears or the texture becomes too spongy, it’s time to discard it. The 8-hour chill is important for the cheesecake to set right. Skipping this can make the layers crumbly.
Serving Suggestions for Your Red Velvet Dessert
When it’s time to serve your red velvet dessert, let it be the main attraction. Cut it into 8 to 10 pieces. Serve with whipped cream or chocolate ganache made from dark chocolate chips and heavy cream.
For a festive look, add extra crushed Oreos or fresh berries. This adds a nice touch to the rich cake and cheesecake layers.
Let the dessert sit at room temperature for 10–15 minutes after cutting. This makes it even more enjoyable. Pair it with a drink like iced coffee, sparkling lemonade, or a bold red wine.
The cream cheese frosting adds a creamy touch. A sprinkle of edible gold dust or crushed candy canes (for winter) makes it look even better. But it doesn’t overpower the dessert’s flavors.
Leftover slices can be stored in an airtight container for up to 4 days. If you want to serve them quickly, just chill them for 10 minutes. This dessert also freezes well for up to 2 months. So, you can enjoy its creamy texture and Oreo crunch even weeks later.
Get inspired with more mouthwatering recipes! Follow me on Facebook, Pinterest, and subscribe to YouTube for new cooking ideas every week.
FAQ
Can I use low-fat cream cheese in this recipe?
Low-fat cream cheese can be used, but it might not be as creamy as full-fat. For the best taste and texture, full-fat cream cheese is recommended.
How should I store leftovers of the cheesecake?
Keep leftovers in a sealed container in the fridge for up to a week. For longer storage, freeze it properly to keep its taste and texture.
Can I make this red velvet oreo cheesecake ahead of time?
Yes, you can make it ahead. It’s great for preparing a day or two before and chilling until ready to serve.
What kind of cocoa powder is best for the red velvet flavor?
Use high-quality unsweetened cocoa powder for the best red velvet taste. Dutch-processed cocoa is a good choice for its deeper color and flavor.
Can I substitute Oreos with another type of cookie?
Yes, you can swap Oreos with other chocolate sandwich cookies. It changes the flavor but can be delicious.
Is it necessary to use a water bath when baking my cheesecake?
Yes, a water bath helps prevent cracks by keeping the baking environment moist. It ensures even cooking and a creamy texture.
Can I use liquid food coloring instead of gel for the red velvet cheesecake?
Liquid food coloring can be used, but gel is better for its deep color and less effect on the batter’s consistency.
How long should I let the cheesecake cool before refrigerating it?
Cool the cheesecake in the oven with the door ajar for an hour. Then, let it cool at room temperature. Refrigerate for at least four hours for the best results.
What can I do if my cheesecake cracks during baking?
Cracks are okay! Cover them with cream cheese frosting or ganache for a stunning dessert.
Are there any gluten-free alternatives for this cheesecake recipe?
Yes, make it gluten-free by using gluten-free Oreos for the crust. Make sure all ingredients are gluten-free.

Heavenly Red Velvet Oreo Cheesecake Recipe
- Total Time: 7 hours
- Yield: 12 slices 1x
Description
This Heavenly Red Velvet Oreo Cheesecake features a buttery Oreo cookie crust topped with an ultra-creamy red velvet cheesecake filling loaded with Oreo chunks. Rich, smooth, and visually stunning, it’s a show-stopping dessert perfect for holidays, birthdays, Valentine’s Day, or any special occasion.
Ingredients
- 3 cups Oreo cookies, finely crushed (about 26 cookies)
- 6 tablespoons unsalted butter, melted
- 32 oz full-fat cream cheese, softened
- 1 cup granulated sugar
- 3/4 cup sour cream
- 1/2 cup heavy cream
- 4 large eggs, room temperature
- 1 teaspoon vanilla extract
- 1/4 cup unsweetened cocoa powder (Dutch-processed preferred)
- 1 teaspoon red gel food coloring
- 12–15 Oreo cookies, chopped
Instructions
- Preheat the oven to 325°F (165°C) and grease a 9-inch springform pan.
- Mix crushed Oreo cookies with melted butter until evenly combined, then press firmly into the bottom of the pan to form the crust.
- Bake the crust for 10 minutes, remove from the oven, and let cool completely.
- In a large bowl, beat the cream cheese and sugar until smooth and creamy.
- Add the eggs one at a time, mixing on low speed until just combined.
- Mix in sour cream, heavy cream, vanilla extract, and cocoa powder until smooth.
- Add red gel food coloring and mix gently until evenly colored.
- Fold in the chopped Oreo cookies.
- Pour the cheesecake batter over the cooled crust.
- Wrap the pan in foil and place it in a water bath.
- Bake for 38–45 minutes until the edges are set and the center slightly jiggles.
- Turn off the oven, crack the door open, and let the cheesecake cool inside for 1 hour.
- Cool to room temperature, then refrigerate for at least 6 hours or overnight before slicing and serving.
Notes
- Use full-fat cream cheese for the creamiest texture.
- All ingredients should be at room temperature before mixing.
- Avoid overmixing after adding eggs to prevent cracks.
- Gel food coloring is recommended for vibrant color without thinning the batter.
- For clean slices, wipe the knife between cuts.
- Prep Time: 20 minutes
- Cook Time: 45 minutes
- Category: Dessert
- Method: Baking
- Cuisine: American
Nutrition
- Serving Size: 1 slice
- Calories: 520
- Sugar: 38 g
- Sodium: 420 mg
- Fat: 34 g
- Saturated Fat: 19 g
- Unsaturated Fat: 13 g
- Trans Fat: 0 g
- Carbohydrates: 46 g
- Fiber: 2 g
- Protein: 8 g
- Cholesterol: 145 mg
What Are Our Readers Saying?
There are no reviews yet. Be the first one to write one.