Baked Salmon Sushi Cups with Spicy Kewpie Mayo

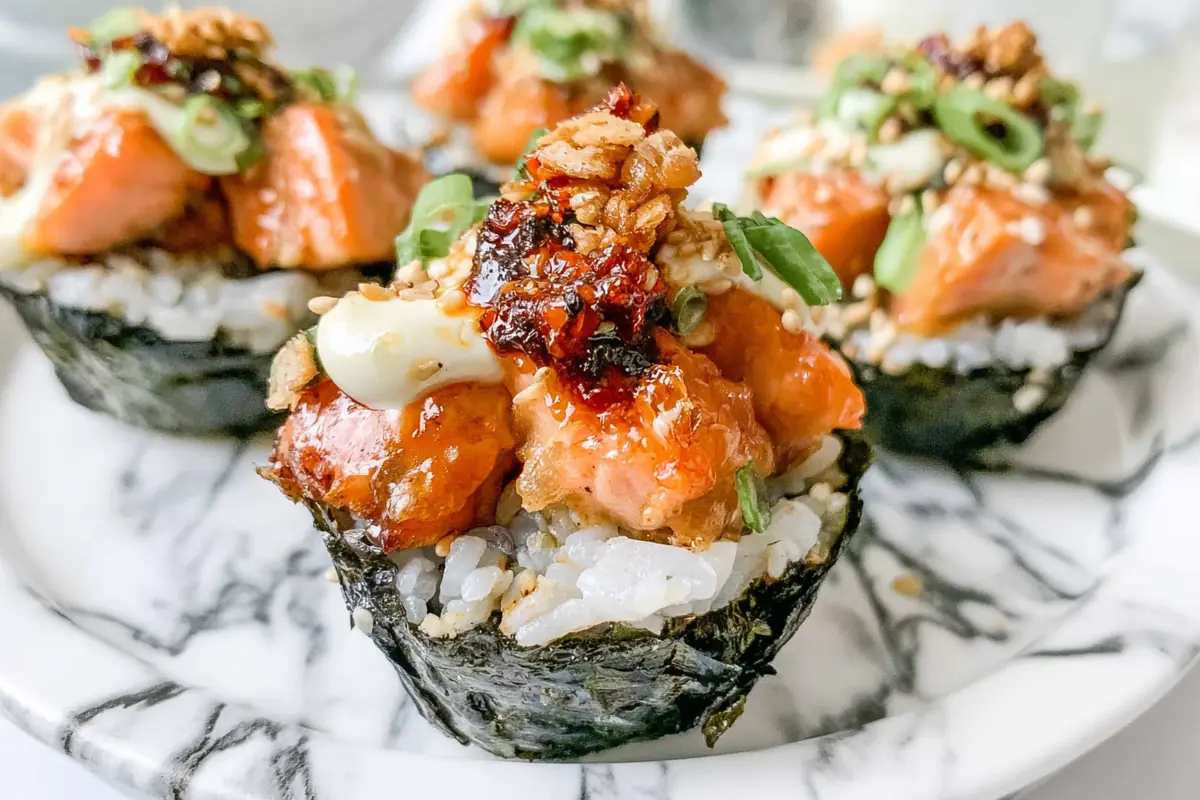
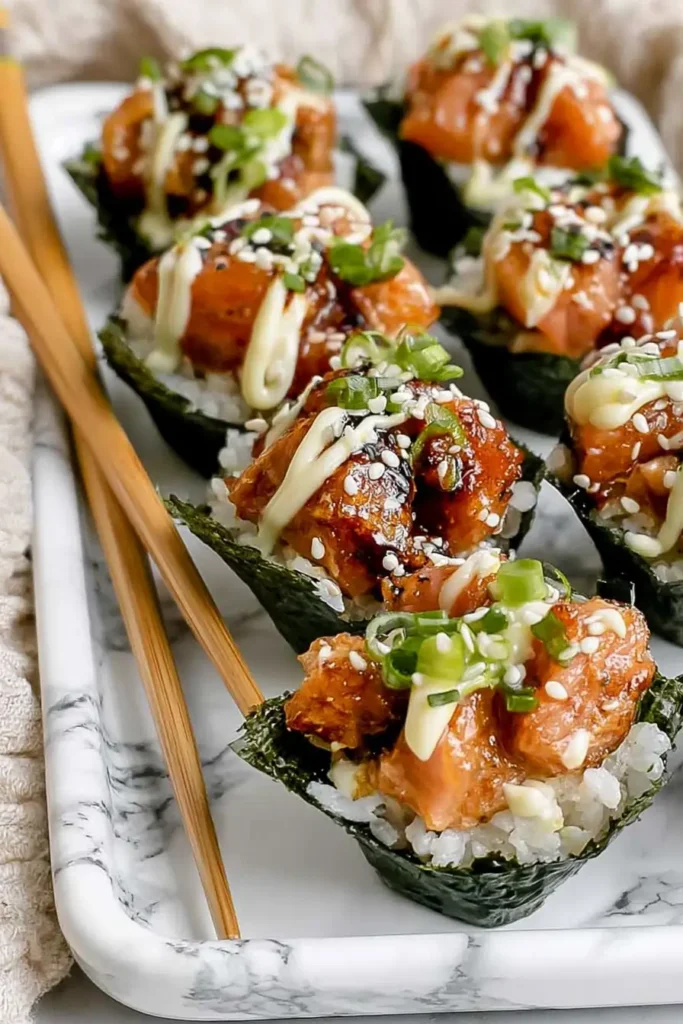
Baked Salmon Sushi Cups give you the savory, spicy flavor of a salmon roll without asking you to shape or slice anything. Each cup has warm vinegared rice, tender salmon, crisp panko, and creamy Kewpie mayo tucked into a sheet of nori.
They bake in a muffin tin at 400°F, so the edges hold together while the salmon cooks. It’s a practical recipe for lunch, appetizers, or a quick dinner when rolling sushi sounds like too much work.
Why These Baked Salmon Sushi Cups Work So Well
The muffin tin does most of the shaping for you. A square of nori lines each cavity, the rice weighs it down, and the salmon sits neatly on top. No bamboo mat. No careful rolling.
The 15-minute bake warms the rice and cooks the small salmon cubes quickly without drying them out. I like the contrast most: soft rice underneath, creamy salmon in the center, and a light panko crunch across the top. After 5 minutes of cooling, the cups are firm enough to lift from the pan while still warm enough to serve right away.
Ingredients for Baked Salmon Sushi Cups
Start with 1 to 1½ pounds of skinless salmon, cut into pieces about ½ inch wide. Keeping the cubes close in size helps them cook evenly during the short baking time. Larger chunks may still look underdone in the center when the smaller ones are ready.
You’ll also need 1½ cups cooked sushi rice, 1 teaspoon rice vinegar, and 12 nori squares. I cut one full nori sheet into four pieces, which gives the cups more support than thin snack-style seaweed.
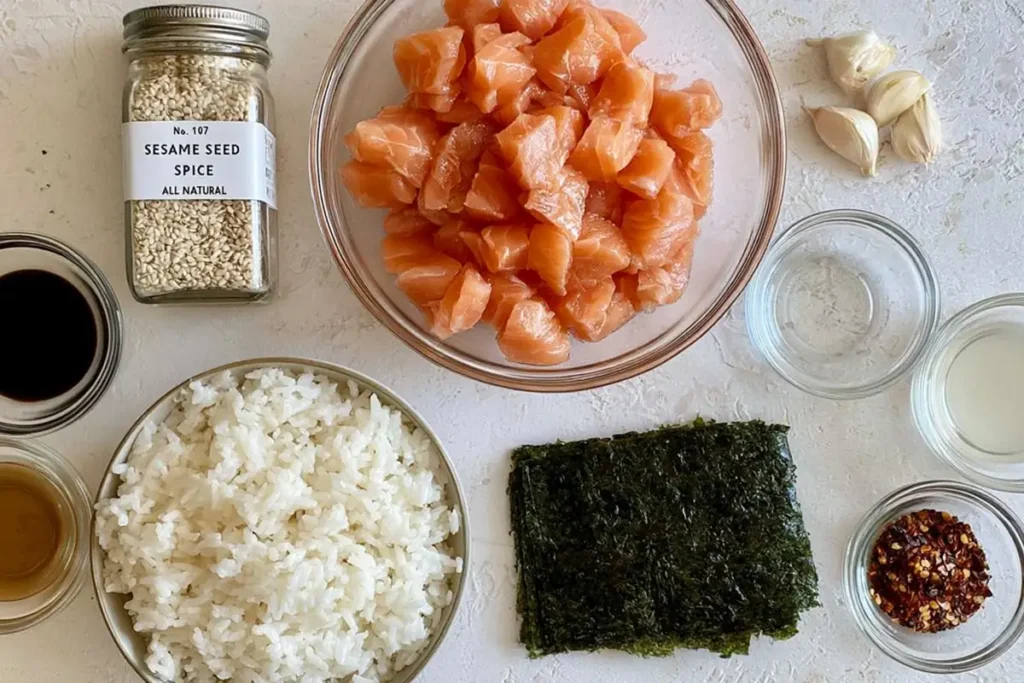
The salmon mixture gets its flavor from 2 tablespoons soy sauce, 1 teaspoon sesame oil, 2 minced garlic cloves, ½ teaspoon chili flakes, ¼ teaspoon salt, and 1 to 2 tablespoons Kewpie mayo. Use enough mayo to coat the fish, not drown it. A wet mixture can soften the nori before the cups reach the oven.
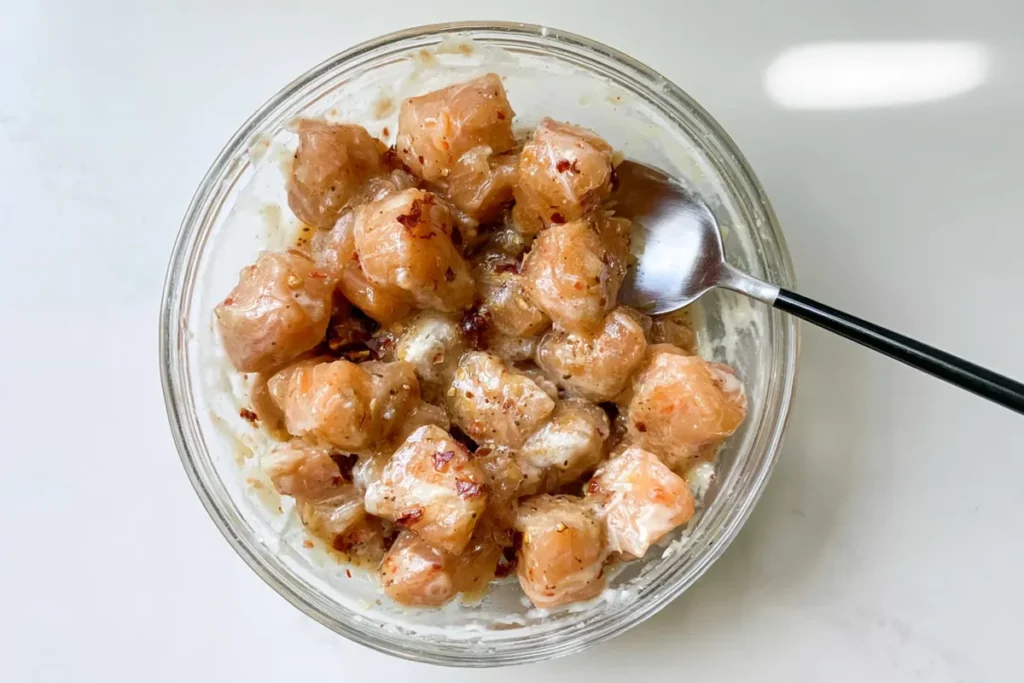
Finish with ¼ cup panko, then add more Kewpie mayo, green onions, sesame seeds, and chili oil crunch after baking.
For a gluten-free version, use gluten-free soy sauce or coconut aminos along with gluten-free panko. The rest of the recipe is naturally dairy-free, though it’s still worth checking the labels on sauces and mayonnaise.
How to Assemble and Bake the Sushi Cups
Heat the oven to 400°F and coat a 12-cup muffin tin with non-stick spray. Grease the sides as well as the bottoms. The rice can cling to dry spots, especially around the edges where the nori folds.
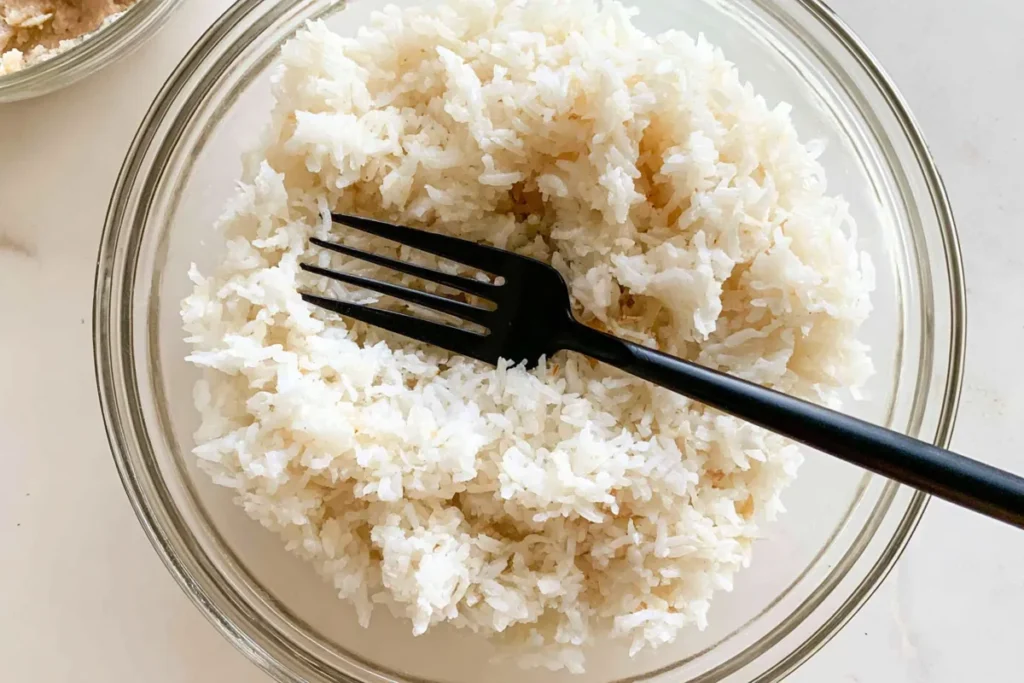
Prepare the sushi rice according to the package directions and let it sit while you work on the salmon. Cut the fish into ½-inch cubes, then mix it with the salt, soy sauce, sesame oil, garlic, chili flakes, and Kewpie mayo. Stir only until every piece is coated. Too much mixing can break down the salmon and leave the filling pasty.
Once the rice is ready, fold in 1 teaspoon rice vinegar. It should be warm and sticky, not watery. Cut the nori into 12 squares and place one piece over each muffin cavity. Press a scoop of rice into the center so the nori settles into the cup. Don’t force the corners flat; a few folds are normal.
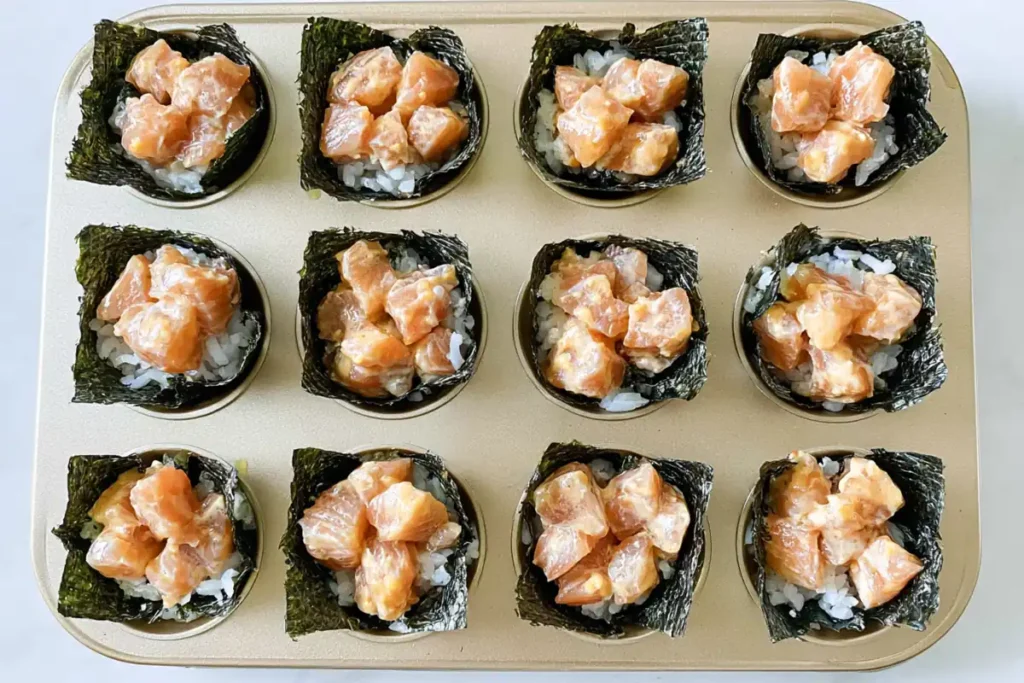
Divide the marinated salmon over the rice. Keep the filling below the rim so the cups bake evenly and are easier to remove. Sprinkle panko over each one, then bake for 15 minutes.
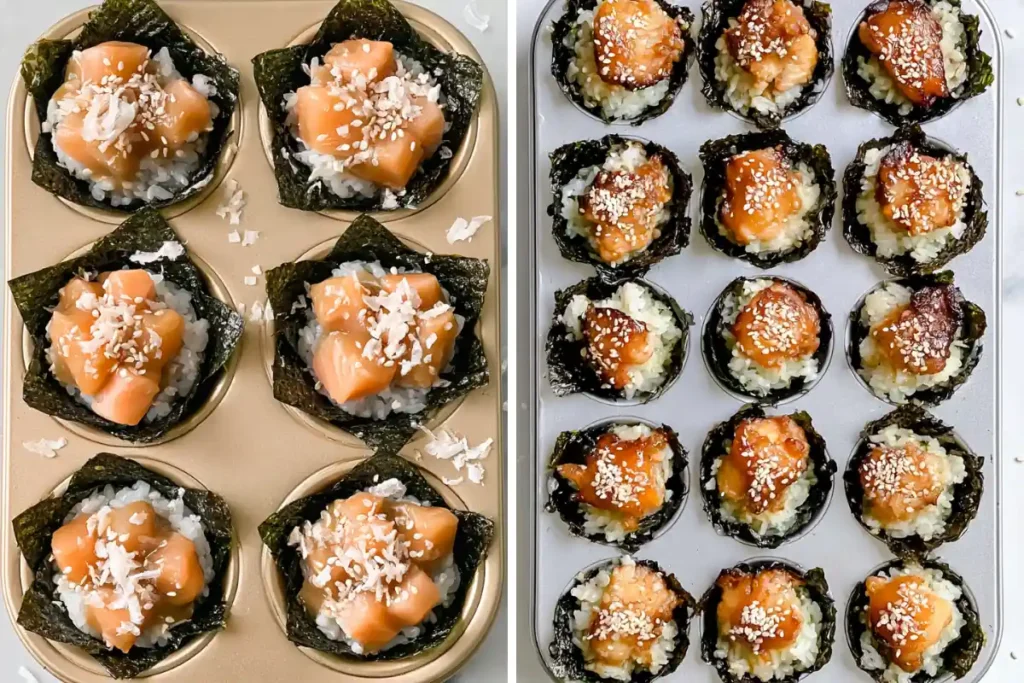
Let the pan stand for 5 minutes after it comes out of the oven. This brief rest helps the rice set. Run a thin spatula around any stuck edges, lift the cups out gently, and add the fresh toppings just before serving.
Tips for Cups That Hold Their Shape
Use full nori sheets rather than thin roasted seaweed snacks. Snack sheets tend to crack when pressed into the muffin tin and soften faster once they touch warm rice.
Don’t pack the rice too tightly. A firm press is enough to anchor the nori, while heavy pressure can make the base dense. About one even scoop per cup usually works.
Keep the salmon mixture thick, too. If liquid collects at the bottom of the bowl, leave the excess behind instead of spooning it into the cups. Greasing the tin and allowing the full 5-minute cooling time also makes removal much easier.
Warm, Creamy, Savory, and Crisp
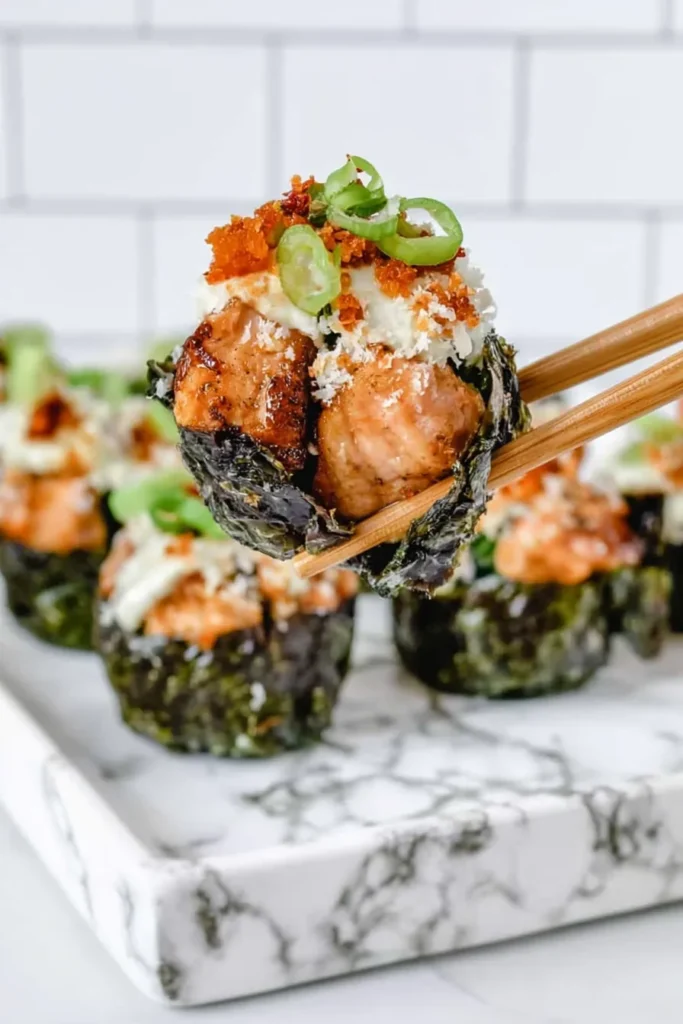
These cups have more contrast than a standard cold sushi roll. The rice stays warm and chewy, while the salmon turns tender and rich in the oven. Kewpie mayo gives the filling a gentle tang, and the soy sauce and sesame oil add a deeper savory flavor without overpowering the fish.
The panko matters. After 15 minutes at 400°F, it picks up a light crunch that breaks up the softer textures underneath. Chili flakes warm the filling, while chili oil crunch adds a sharper finish. Green onions and sesame seeds keep each bite fresh instead of heavy.

Serving and Storing Salmon Sushi Cups
Serve the cups after their 5-minute rest, while the rice is still warm and the panko is crisp. Add the Kewpie mayo, sliced green onions, sesame seeds, and chili oil crunch after removing them from the tin. Adding those toppings before baking can dull their flavor and soften the surface.
These work well as a light dinner, a lunch, or a shared appetizer. I usually serve three cups per person for lunch and fewer when they’re part of a larger spread.
Refrigerate leftovers in an airtight container once they have cooled. Use them within 2 days and reheat at 350°F for about 8 to 10 minutes, until the salmon and rice are hot throughout. The nori will soften in the refrigerator, so the texture won’t be quite the same as the first day. An oven or air fryer brings back more crunch than a microwave.
A Simple Sushi-Inspired Meal to Make at Home
Baked Salmon Sushi Cups are useful when you want familiar sushi flavors without setting aside time to roll and slice individual pieces. The muffin tin keeps the portions tidy, and the short bake makes the method easy to repeat.

Keep the salmon cubes small, avoid adding excess marinade, and give the cups a few minutes to settle before lifting them out. Add the toppings you enjoy, then serve them warm while the panko still has a little crunch.
Baked Salmon Sushi Cups
Ingredients
Equipment
Method
- Preheat the oven to 400°F and coat the bottom and sides of a 12-cup muffin tin with non-stick cooking spray.
- Prepare the sushi rice according to the package directions, then set it aside while you prepare the salmon.
- Cut the skinless salmon into evenly sized 1/2-inch cubes and place them in a medium mixing bowl.
- Add the sea salt, soy sauce, sesame oil, minced garlic, chili flakes, and Kewpie mayonnaise to the salmon, then mix gently until every piece is evenly coated.
- Cut the full nori sheets into 12 sturdy squares, using one sheet to make four squares.
- Fold the rice vinegar into the warm cooked sushi rice until evenly distributed.
- Place one nori square over each muffin cavity and press a scoop of seasoned rice into the center so the nori settles into the cup.
- Divide the marinated salmon evenly among the cups, keeping the filling below the rim of the muffin tin.
- Sprinkle the panko bread crumbs evenly over the salmon, then bake the sushi cups for 15 minutes.
- Allow the salmon sushi cups to cool in the pan for 5 minutes so the rice can set and the cups hold their shape.
- Run a thin spatula around any stuck edges, gently remove the cups, and top them with Kewpie mayonnaise, green onions, sesame seeds, and chili oil crunch before serving.
Notes
- Use full nori sheets rather than thin roasted seaweed snacks because the sturdier sheets hold their shape better in the muffin tin.
- Leave excess liquid behind in the salmon bowl so the nori does not become overly soft during baking.
- Do not pack the rice too firmly; a gentle press is enough to anchor each nori square.
- Refrigerate cooled leftovers in an airtight container for up to 2 days and reheat at 350°F for 8 to 10 minutes.