
Dreamy Peanut Butter Chocolate Cheesecake Bars

Imagine a dessert so indulgent, it feels like a dream come true. Peanut butter and chocolate unite in a creamy cheesecake, layered to perfection in a convenient bar format. These portable treats are not just delicious—they’re designed for ease, making them a crowd-pleaser at any gathering.
Why choose between a full cheesecake and a quick snack when you can have both? These bars offer the best of both worlds: the rich flavor of a cheesecake and the convenience of a handheld dessert. Plus, with quick bake and chill times, they’re ready to impress in no time.
The magic lies in the layers. A crunchy crust gives way to a smooth, creamy filling, creating a texture that’s as satisfying as it is indulgent. It’s like a peanut butter cup, but in cheesecake form—a match made in dessert heaven.
Whether you’re hosting a party, celebrating a holiday, or just need a sweet escape, these bars are the perfect choice. Each bite is a reminder that sometimes, life’s simplest pleasures are the most delightful.
Key Takeaways
- These bars combine the flavors of peanut butter and chocolate in a creamy cheesecake format.
- They are portable, easy to serve, and require minimal utensils.
- The recipe is quick to prepare, with fast bake and chill times.
- Perfect for parties, holidays, or casual gatherings.
- Each bar offers a satisfying texture with a crunchy crust and smooth filling.
Introduction to Your Dreamy Dessert
Step into the world of a dessert that masterfully blends the creaminess of cream cheese with the satisfying crunch of a cookie crust. This treat is designed to captivate your senses with its harmonious balance of flavors and textures.
Discover the Allure of a Peanut Chocolate Treat
The allure of this dessert lies in its perfect harmony of flavors. The combination of peanut and chocolate creates a rich, indulgent taste that’s hard to resist. The peanut adds a nutty depth, while the chocolate provides a velvety smoothness, making each bite a delight.
What Sets These Cheesecake Bars Apart
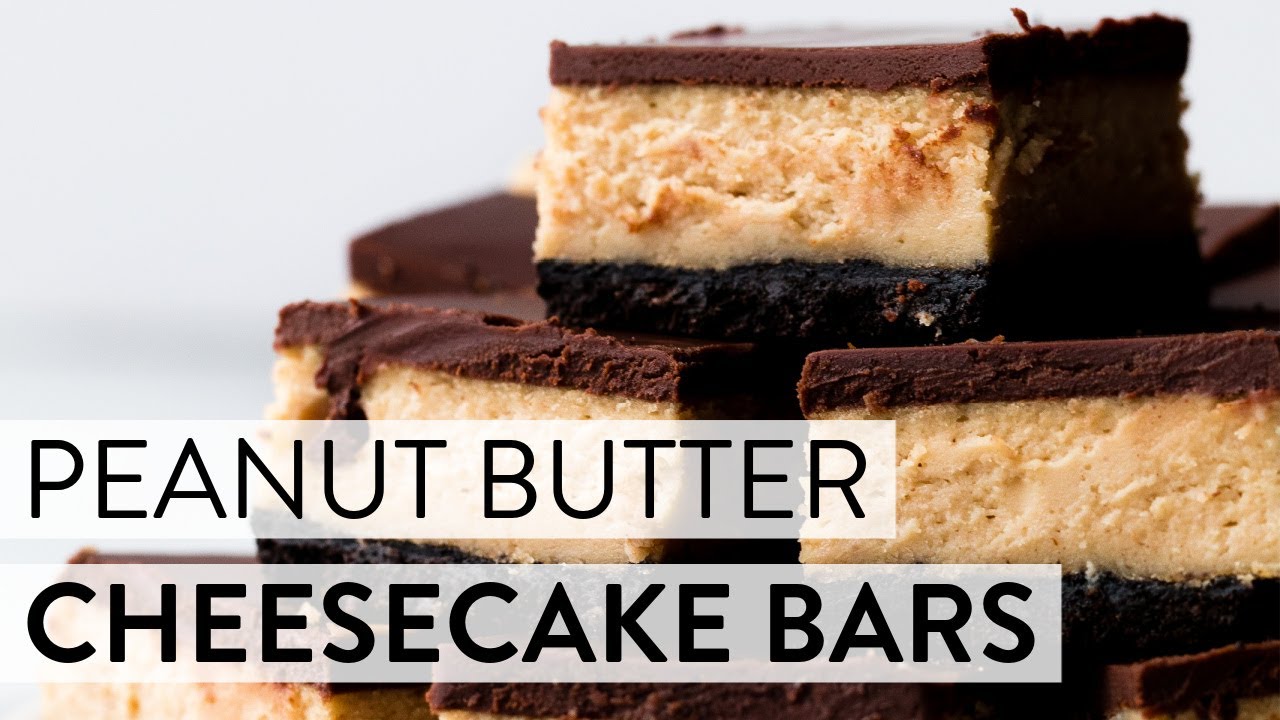
What truly sets these cheesecake bars apart is their layered composition. A buttery cookie crust forms the base, topped with a smooth, creamy filling. This careful layering ensures that each bite offers a delightful contrast of textures. The baking process is designed to maintain these distinct layers, with the crust baked to a golden crisp before being filled with the cheesecake mixture.
The role of butter and peanut in this recipe cannot be overstated. The butter enhances the richness of the crust, while the peanut adds a unique flavor profile that complements the chocolate perfectly. Every element, from the cream cheese mixture to the cookie and butter components, comes together to create a truly memorable taste experience.
These bars are not just delicious; they’re also incredibly easy to prepare. With a quick baking time and a straightforward filling process, they’re ready to impress in no time. Whether you’re hosting a party or just need a sweet escape, these bars are the perfect choice.
Each bar offers a satisfying texture with a crunchy crust and smooth filling. It’s like a peanut butter cup, but in cheesecake form—a match made in dessert heaven. The combination of textures and flavors ensures that every bite is simply delightful.
Essential Ingredients & Must-Have Tools
To craft the perfect dessert, you need the right ingredients and tools. This section will guide you through the key components that make these bars exceptional.
Key Ingredients for Flavor and Texture
The foundation of these bars lies in their ingredients. Cream plays a vital role in achieving a smooth texture, while sugar balances the flavors. Eggs, particularly at room temperature, ensure a consistent batter. Each ingredient is chosen for its ability to enhance both taste and texture, creating a delightful experience in every bite.
Recommended Equipment for a Smooth Baking Experience
The right tools are just as important as the ingredients. A 9×13-inch pan is ideal for even baking, while an electric mixer ensures a smooth batter. Mixing bowls and a precise oven temperature are crucial for the perfect bake. These tools work together to simplify the process and deliver consistent results.

Step-by-Step Process: From Crust to Creamy Filling
Creating these delicious bars involves a straightforward process that ensures each layer is perfectly crafted. By following these steps, you’ll achieve a dessert that’s both visually appealing and irresistibly tasty.
Crafting a Buttery, Chocolate Cookie Crust
Start by preparing the crust, which lays the foundation for your dessert. Mix crushed chocolate cookies with melted butter until well combined. Press this mixture into a baking dish and bake for about 10 minutes, or until lightly browned. Allow the crust to cool slightly before proceeding.

Creating the Perfect Filling
Next, focus on the filling. Beat the cream cheese until smooth, then gradually add sugar, eggs, and vanilla extract. Stir in peanut butter until fully incorporated. Pour this mixture over the cooled crust and bake for 25-30 minutes, or until the edges are set but the center is slightly jiggly.
Let the dessert cool for an hour before refrigerating it for at least four hours. This allows the flavors to meld and the texture to set properly. Once chilled, slice into bars and serve.
Peanut Butter Chocolate Cheesecake Bars
Discover the secret to creating irresistible desserts with these chocolate peanut cheesecake bars. Perfect for any occasion, they combine a crunchy crust with a creamy filling, offering a delightful texture in every bite.
Baking and Chilling Tips for Optimal Texture
To achieve the perfect texture, press the crust mixture firmly into the pan’s bottom. Bake at 325°F for 25-30 minutes, ensuring the edges are set but the center remains slightly jiggly. Allow the bars to cool at room temperature for an hour before refrigerating them for at least four hours. This step is crucial for allowing the flavors to meld and the texture to set properly.
Variations, Serving Ideas, and Plate Presentation
Enhance your dessert with creative variations. Sprinkle a handful of chocolate chips or peanut butter chips on top for added flavor. For a professional presentation, cut the bars into uniform squares and serve on a decorative plate. Consider adding fresh fruit or a drizzle of caramel for a finishing touch.

Remember, precise instructions and attention to detail are key to delivering a memorable dessert experience. With these tips, you’ll be sure to impress your guests every time!
FAQ
What ingredients do I need for the crust?
You’ll need a cup of chocolate sandwich cookies, 1/4 cup of sugar, and 1/4 cup of melted butter.
Can I use a different type of cookie for the crust?
You can try graham crackers, wafers, or other crunchy cookies for a different flavor.
How long should I bake the crust?
Bake at 350°F for 10 minutes or until lightly browned. Let it cool before adding the filling.
What’s the best way to ensure a smooth cheesecake filling?
Use room temperature cream cheese and eggs, and mix on medium speed until smooth.
Can I make these bars without a mixer?
Yes, but use a whisk or spatula and mix thoroughly to remove lumps.
How long does it take to prepare the filling?
About 15 minutes, including mixing cream cheese, sugar, eggs, and vanilla.
What’s the ideal baking time for the cheesecake layer?
Bake at 325°F for 25–30 minutes. The edges should be set and the center slightly jiggly.
How long should I let the bars chill?
At least 4 hours, preferably overnight, for best texture and flavor.
Can I freeze these cheesecake bars?
Yes. Freeze individually and store in an airtight container for up to 2 months.
What’s the best way to cut clean slices?
Use a sharp knife, clean it between cuts, or dip it in hot water for smoother slicing.
Can I customize the recipe with other mix-ins?
Yes, add chocolate chips, nuts, or a caramel drizzle for extra flavor.
How many servings does this recipe make?
Between 9 and 16 bars, depending on how large you cut them.
Can I make these bars in a different pan size?
Yes, but adjust the baking time. Larger pans need more time, smaller need less.
Why did my cheesecake crack?
Cracks can form from overmixing, baking at the wrong temp, or cooling too fast.
Can I make these bars ahead of time?
Yes, up to 3 days in advance. Store in the fridge in an airtight container.
How should I store leftover bars?
Refrigerate in an airtight container for up to a week or freeze for longer.
Can I substitute the cream cheese?
Try mascarpone or Neufchâtel cheese, though the flavor will differ slightly.
Can I make these bars gluten-free?
Yes, use gluten-free cookies and ensure all ingredients are gluten-free.
Can I serve these at room temperature?
They can be served at room temp, but they taste better chilled.
Can I make them dairy-free?
Use dairy-free cream cheese and butter alternatives. Texture may vary slightly.
Conclusion
With these simple steps, you can create a dessert that’s both impressive and delicious. The key to success lies in the bake minute precision and the option to use a microwave for melting ingredients, ensuring a smooth process from start to finish.
Serving these treats at the right room temperature enhances their flavor and texture. Quick prep steps and a helpful link to additional tips make this recipe even more accessible. Feel free to experiment with variations while maintaining the consistency of your butter cheesecake bar.
Remember to cut neatly for an attractive presentation and maintain the right speed during assembly. This recipe ties together flavor, texture, and ease, inviting you to enjoy the delicious outcome with confidence.
Print
Dreamy Peanut Butter Chocolate Cheesecake Bars
- Total Time: 5 hours (including chilling)
- Yield: 12–16 bars 1x
- Diet: Vegetarian
Description
A decadent dessert combining creamy peanut butter cheesecake with a rich chocolate cookie crust. These handheld bars offer layers of flavor and texture—crunchy, smooth, and dreamy. Perfect for parties, holidays, or sweet indulgences.
Ingredients
For the crust:
1 cup crushed chocolate sandwich cookies
1/4 cup granulated sugar
1/4 cup melted butter
For the filling:
16 oz (2 blocks) cream cheese, softened
3/4 cup granulated sugar
2 large eggs (room temperature)
1 tsp vanilla extract
3/4 cup creamy peanut butter
Instructions
-
Preheat oven to 350°F (175°C).
-
Make the crust: In a bowl, combine crushed cookies, sugar, and melted butter. Press firmly into a greased or parchment-lined 9×13-inch baking pan.
-
Bake crust for 10 minutes. Remove and let cool slightly. Reduce oven to 325°F (163°C).
-
Make the filling: In a large bowl, beat cream cheese until smooth. Add sugar and mix well.
-
Beat in eggs one at a time, then add vanilla. Stir in peanut butter until fully incorporated.
-
Pour filling over cooled crust and smooth the top.
-
Bake at 325°F for 25–30 minutes until edges are set and the center is slightly jiggly.
-
Cool at room temperature for 1 hour.
-
Chill in the fridge for at least 4 hours (preferably overnight).
-
Slice into bars and serve.
Notes
Use room temperature ingredients for a smoother filling.
Wipe your knife between cuts for cleaner slices.
Optional: Top with chocolate chips, peanut butter chips, or a drizzle of caramel.
Can be made ahead and stored in the fridge for 3 days or frozen for up to 2 months.
- Prep Time: 15 minutes
- Cook Time: 40 minutes (10 for crust + 30 for filling)
- Category: Dessert
- Method: Baking
- Cuisine: American
What Are Our Readers Saying?
There are no reviews yet. Be the first one to write one.


