
German Chocolate Cake Roll Recipe That Will Blow Your Mind

There’s something magical about desserts that blends nostalgia with innovation. Imagine a treat that evokes memories of cozy family gatherings and surprises your taste buds with a modern twist. This isn’t just a recipe—it’s a celebration of tradition reimagined for today’s kitchens.
For decades, bakers have cherished the rich layers of cocoa and coconut-pecan filling in this iconic dessert. But even classics can evolve. Our updated version prioritizes moist texture and bold flavor, ensuring every bite feels indulgent yet effortless to create.
You’ll discover how simple techniques—like gently folding egg whites or mastering the perfect swirl—transform basic ingredients into a show-stopper. Whether you’re a seasoned baker or a first-timer, this guide simplifies the process without compromising on elegance.
Table of Contents
Overview of the German Chocolate Cake Roll
Modern palates crave both familiarity and excitement—a balance this dessert achieves effortlessly. By reimagining traditional baking methods, it delivers a luxurious experience that feels fresh yet comforting.
A Modern Twist on Timeless Flavors
The secret lies in blending rich cocoa powder with velvety egg yolks and aromatic vanilla extract. These ingredients create a sponge so tender it practically melts on your tongue. Unlike dense layer cakes, the roll cake format ensures each slice offers balanced sweetness and visual drama.
Why This Treat Stands Out
The silky texture sets this creation apart. Gentle folding techniques preserve the batter’s airy texture, while the coconut-pecan filling provides a creamy contrast. It’s a showstopper that looks intricate but comes together with smart shortcuts.
Perfect for dinner parties or weeknight indulgences, this roll cake proves elegance doesn’t require complexity. The interplay of deep cocoa notes and subtle vanilla makes every bite memorable—no fancy tools are needed.
Ingredients and Essential Tools
Great desserts start with thoughtful preparation. Selecting high-quality components and using the proper tools ensures your creation tastes as good as it looks. Let’s break down what you’ll need before diving into the process.

Core Ingredients: From Cocoa Powder to Vegetable Oil
Your ingredient choices directly impact flavor and texture. Cocoa powder forms the base, delivering rich depth when sifted properly. Vegetable oil keeps the sponge moist without overpowering other flavors. Egg yolks add structure, while vanilla extract balances sweetness.
| Ingredient | Purpose | Pro Tip |
|---|---|---|
| Granulated sugar | Stabilizes egg whites | Measure precisely for even texture |
| Salt | Enhances cocoa flavor | Use fine-grain for even distribution |
| All-purpose flour | Provides structure | Sift twice to prevent lumps |
Must-Have Kitchen Equipment and Tips
Specialized tools simplify the process. A 12×17-inch baking pan ensures even thickness, while parchment paper prevents the food from sticking. Use a fine mesh sieve to aerate dry ingredients. An electric mixer creates stiff peaks in egg whites quickly and efficiently.
Keep a clean kitchen towel dusted with cocoa nearby for rolling. Mixing bowls should be grease-free to help egg whites whip properly. Remember: every tool serves a purpose in achieving that airy, tender crumb.
Preparation and Baking Techniques
Precision transforms simple ingredients into extraordinary results. Every step—from measuring to mixing—shapes the final texture and flavor. Let’s break down the methods that ensure success.

Preheating, Sifting, and Mixing for a Light Sponge
Start by heating your oven to 350°F. This stabilizes the batter’s rise from the moment it hits the heat. Use an oven thermometer for accuracy; even a 10°F difference can affect results.
Sift cocoa, flour, and salt twice. This aerates dry ingredients, preventing them from forming clumps. Fold them into whipped egg yolks gently using a silicone spatula. Overmixing deflates the batter; stop when the streaks disappear.
| Common Mistake | Solution | Impact |
|---|---|---|
| Rushing preheating | Whip until the ribbon stage | Even baking |
| Lumpy batter | Sift twice, mix in thirds | Smooth texture |
| Overbeating yolks | Whip until ribbon stage | Flexible sponge |
Mastering the Whisk: Egg Whites and Flavor Boosters
Beat room-temperature egg whites with cream of tartar. Add sugar gradually—this creates stable peaks. Stop when the whisk leaves soft ridges that hold shape.
Fold whites into batter in three batches. Add extract or espresso powder here for depth. Bake immediately for 12-14 minutes. The edges should pull away slightly when done.
Cool the sponge on a wire rack for 5 minutes before rolling. Timing matters—too hot, and it tears; too cool, and it cracks. Your kitchen thermometer ensures precision at every stage.
Expert Rolling and Assembling Steps
Perfecting the spiral shape requires both strategy and finesse. Timing and temperature play starring roles here—get them right, and you’ll craft a dessert that impresses visually while preserving its airy texture.

Rolling While Warm: Using a Cocoa-Dusted Towel
Transfer the baked sponge onto a towel dusted with cocoa immediately after removing it from the oven. This prevents sticking while adding subtle flavor. Start at one short edge, using the towel to guide the roll into a tight cylinder. Apply even pressure without squishing the delicate layers.
Let the wrapped dessert rest at cool room temperature for 25 minutes. This sets the shape while maintaining the structure’s flexibility. Unroll gently to avoid tearing—you’ll notice the sponge now holds a natural curve.
Spread your filling evenly, leaving a half-inch border. Re-roll using the towel’s edge to maintain control. A slight tuck-and-push motion creates uniform layers. Chill for one hour before slicing to lock in the spiral.
| Mistake | Fix | Result |
|---|---|---|
| Rolling too late | Work within 2 minutes of baking | Flexible shape |
| Overfilling edges | Leave space for expansion | Clean slices |
| Skipping chilling | Refrigerate until firm | Sharp presentation |
Creative Variations and Toppings
Desserts become unforgettable when you add personal flair. This treat’s versatility lets you experiment with textures and flavors while keeping its core appeal. Let’s explore upgrades that transform familiar components into something extraordinary.

Whipped Cream Filling and Optional Marshmallow Fluff
Swap traditional fillings with a cloud-like blend of cream, vanilla extract, and powdered sugar. For a playful twist, fold in marshmallow fluff—it adds gooey sweetness without overpowering cocoa notes. Chill the mixture for 10 minutes before spreading for easier handling.
Balance richness by adjusting butter ratios. Less butter creates an airier texture, while more adds decadence. If using pastry cream, stabilize it with cornstarch to prevent it from becoming too sogginess. Either way, keep layers thin to maintain structural integrity.
Achieving a Glossy, Rich Chocolate Ganache
Elevate your dessert with a silky topping that shines. Heat equal parts cream and dark chocolate until smooth, then whisk in a pat of butter for a glossy finish. Pour while warm for seamless coverage, or chill slightly for piping designs.
| Ganache Ratio | Texture | Best Use |
|---|---|---|
| 1:1 (cream:chocolate) | Pourable | Drizzling |
| 2:1 | Spreadable | Frosting |
| 1:2 | Firm | Truffle filling |
For holidays, sprinkle crushed peppermint or edible gold flakes. Birthdays? Try rainbow sprinkles or caramel swirls. The contrast between light filling and intense ganache delights every palate.
Conclusion
Creating this iconic dessert combines art and science in your kitchen. From selecting premium cocoa powder to mastering the rolling technique, each step builds toward a flawless balance of texture and taste. The airy sponge, enriched with egg yolks and vanilla extract, cradles a luscious filling that elevates every bite.
Customization shines here—swap fillings for whipped cream or drizzle with ganache. Remember: preheating the oven and cooling the mixture properly prevent cracks. This recipe demystifies advanced-looking results through clear, tested methods.
Ready to impress? Follow the baking guidelines, embrace creative twists, and share your masterpiece. Tag photos online to inspire others—because decadent desserts taste even sweeter when made with joy.
FAQ
Can I substitute vegetable oil with another type of fat?
Yes! Melted butter or coconut oil can replace vegetable oil for a richer flavor. Ensure it’s cooled slightly before mixing to avoid cooking the egg yolks.
How do I prevent cracks when rolling the sponge?
Roll the baked sponge immediately after removing it from the oven while it’s still warm. Use a kitchen towel dusted with cocoa powder to gently shape it without sticking.
Can I make this dessert ahead of time?
Absolutely. Assemble the roll, wrap it tightly in plastic, and refrigerate for up to two days. Let it sit at room temperature for 20 minutes before serving for optimal texture.
What’s the best way to store leftovers?
Keep leftovers in an airtight container in the fridge for up to three days. For longer storage, freeze slices wrapped in parchment and foil for up to a month.
Can I use a different filling instead of whipped cream?
Try coconut-pecan frosting, marshmallow fluff, or a fruit compote. Adjust sweetness levels based on your preference to balance the cocoa flavor.
Why does my ganache look grainy?
Graininess often occurs if the chocolate overheats. Use a double boiler or microwave in short bursts, stirring frequently, to melt it smoothly with heavy cream.
Is Dutch-process cocoa powder necessary?
While Dutch-process cocoa enhances richness, natural cocoa works too. Avoid mixing the two, as they react differently with leavening agents like baking soda.
Can I skip sifting the dry ingredients?
Sifting ensures a light, airy sponge by removing lumps. Skipping it may result in a denser texture, so it’s recommended for the best results.
Get inspired with more mouthwatering recipes! Follow me on Facebook, Pinterest, and subscribe to YouTube for new cooking ideas every week.
Print
German Chocolate Cake Roll: A Decadent Dessert to Savor
- Total Time: 1 hour (including cooling and chilling)
- Yield: 10–12 slices 1x
- Diet: Vegetarian
Description
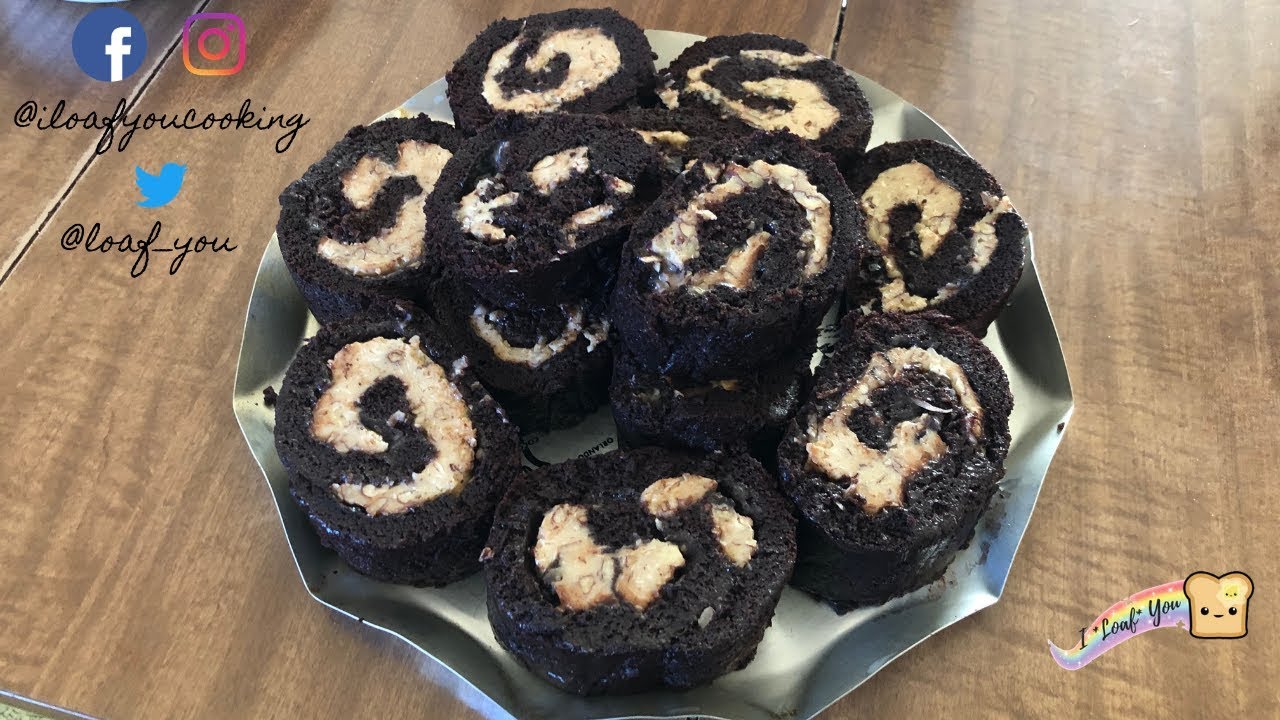
This German Chocolate Cake Roll is a modern twist on a classic dessert, featuring a light, moist chocolate sponge filled with creamy coconut-pecan goodness or fluffy whipped cream, and finished with a silky ganache. Elegant yet approachable, this dessert delivers rich flavor and stunning presentation with minimal fuss.
Ingredients
For the Cake:
¾ cup all-purpose flour
¼ cup Dutch-process cocoa powder
½ tsp baking soda
¼ tsp salt
4 large eggs, separated
⅔ cup granulated sugar
¼ cup vegetable oil
2 tbsp water or brewed coffee
1 tsp vanilla extract
¼ tsp cream of tartar
Cocoa powder (for dusting towel)
Filling Options:
Coconut-Pecan Filling:
1 cup evaporated milk
1 cup granulated sugar
3 egg yolks
½ cup unsalted butter
1 tsp vanilla extract
1 cup shredded sweetened coconut
1 cup chopped pecans
Whipped Cream Filling (alternative):
1 cup heavy cream
2 tbsp powdered sugar
½ tsp vanilla extract
(Optional) ¼ cup marshmallow fluff
Chocolate Ganache Topping (optional):
½ cup heavy cream
4 oz dark chocolate, chopped
1 tbsp unsalted butter
Instructions
-
Preheat Oven: Preheat to 350°F (175°C). Line a 12×17-inch jelly roll pan with parchment paper.
-
Prepare Dry Ingredients: Sift flour, cocoa, baking soda, and salt twice.
-
Make Cake Batter:
-
In one bowl, beat egg yolks, ⅓ cup sugar, oil, water, and vanilla until pale.
-
In another bowl, whip egg whites and cream of tartar to soft peaks, gradually adding the remaining ⅓ cup sugar.
-
Gently fold dry ingredients into yolk mixture, then fold in whipped whites in three parts.
-
-
Bake: Spread batter evenly in the pan. Bake 12–14 minutes, until edges pull away and center springs back.
-
Roll Cake: Immediately invert warm cake onto a cocoa-dusted towel. Peel off parchment. Starting from the short side, roll the cake with the towel. Cool rolled for 25 minutes.
-
Prepare Filling:
-
Coconut-Pecan: Simmer milk, sugar, yolks, and butter until thickened. Stir in vanilla, coconut, and pecans. Cool.
-
Whipped Cream: Beat cream, sugar, and vanilla to stiff peaks. Fold in fluff if using. Chill before use.
-
-
Assemble: Carefully unroll the cake. Spread filling evenly, leaving a ½-inch border. Re-roll tightly.
-
Ganache Topping (optional): Warm cream, pour over chocolate, let sit 1 min. Stir until smooth. Add butter. Pour over chilled cake.
-
Chill: Refrigerate 1 hour before slicing for clean cuts.
Notes
Roll the sponge immediately after baking to prevent cracks.
Let the ganache cool slightly before pouring for better control.
Use espresso or coffee instead of water to deepen chocolate flavor.
Wrap in plastic wrap for up to 2 days or freeze for up to 1 month.
- Prep Time: 20 minutes
- Cook Time: 14 minutes
- Category: Dessert / Cake Roll
- Method: Baking / Rolled
- Cuisine: American
What Are Our Readers Saying?
There are no reviews yet. Be the first one to write one.


