
Perfect Scones with Tender Centers and Flaky Layers


A good batch of Perfect Scones should have lightly crisp edges, a tender middle, and small flaky pockets where cold butter melted into the dough. They shouldn’t feel dry or heavy.
This version uses buttermilk, vanilla, and a straightforward mixing method. The main thing is restraint: keep everything cold, stop mixing early, and shape the dough without pressing out those valuable pieces of butter.
Essential Ingredients for Perfect Scones
All-purpose flour gives the scones enough structure to rise without becoming bread-like. Measure it gently rather than packing it into the cup. Too much flour can leave the centers dry.
Both baking powder and baking soda are used here. Baking powder provides most of the lift, while baking soda reacts with the acidity in the buttermilk. Granulated sugar adds mild sweetness and helps the edges brown.
Cold unsalted butter is the ingredient to watch most closely. Cut it into the flour until the pieces are roughly the size of large peas. They don’t need to disappear. Those solid pieces melt in the oven and leave small spaces behind, giving the crumb a flaky feel.
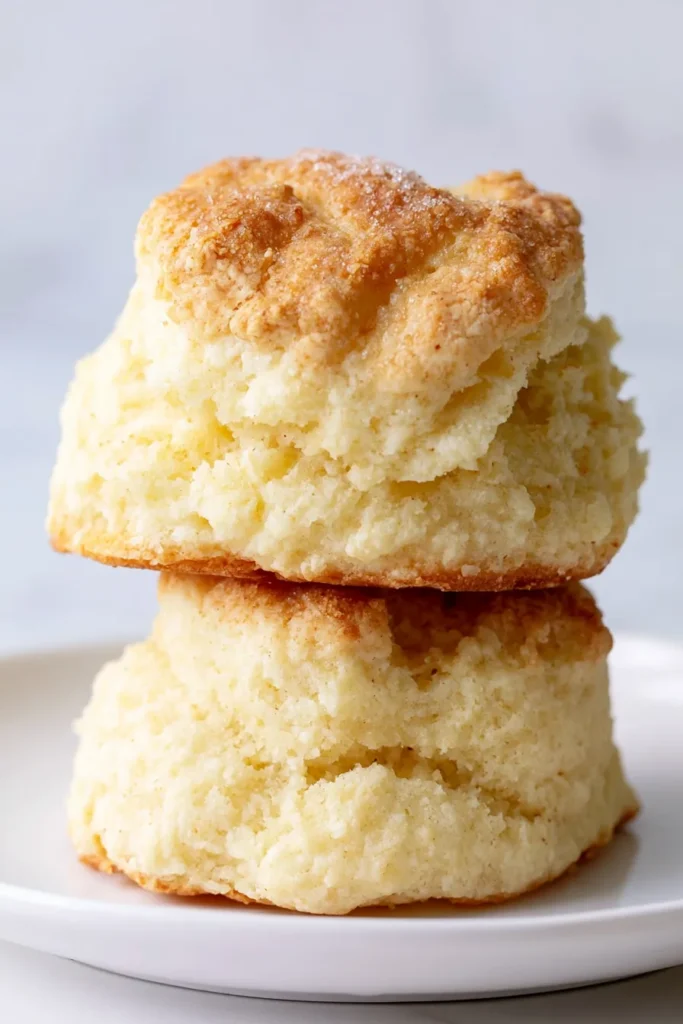
The buttermilk, egg, and vanilla add moisture, richness, and flavor. A second egg mixed with 1 teaspoon water creates the wash for the tops. Finish with coarse sugar for a thin, crisp layer.
Mixing, Shaping, and Baking the Dough
Move the oven rack to the center and heat the oven to 400°F. Line two baking pans with parchment paper before touching the dough. Once the wet and dry ingredients meet, it helps to work without long pauses.
Combine the flour, sugar, salt, baking powder, and baking soda in a large bowl. Add the cold butter and cut it in with a pastry cutter or fork. Stop when most pieces resemble large peas, with a few smaller crumbs scattered through the flour.
In a separate bowl, whisk together the buttermilk, one egg, and vanilla. Make a well in the flour mixture and pour the liquid into the center. Fold gently until you no longer see large pockets of dry flour. The dough may look rough and uneven. That’s fine. A smooth dough usually means it has been handled too much.
Turn it onto a lightly floured surface and divide it into two equal portions. Shape each portion into a round about 6 inches wide and ¾ inch thick. Use light pressure rather than kneading it repeatedly.
Cut each round into eight wedges. Transfer them to the prepared pans, leaving about 2 inches between pieces. Brush the tops with the egg-and-water mixture, then scatter coarse sugar over them.
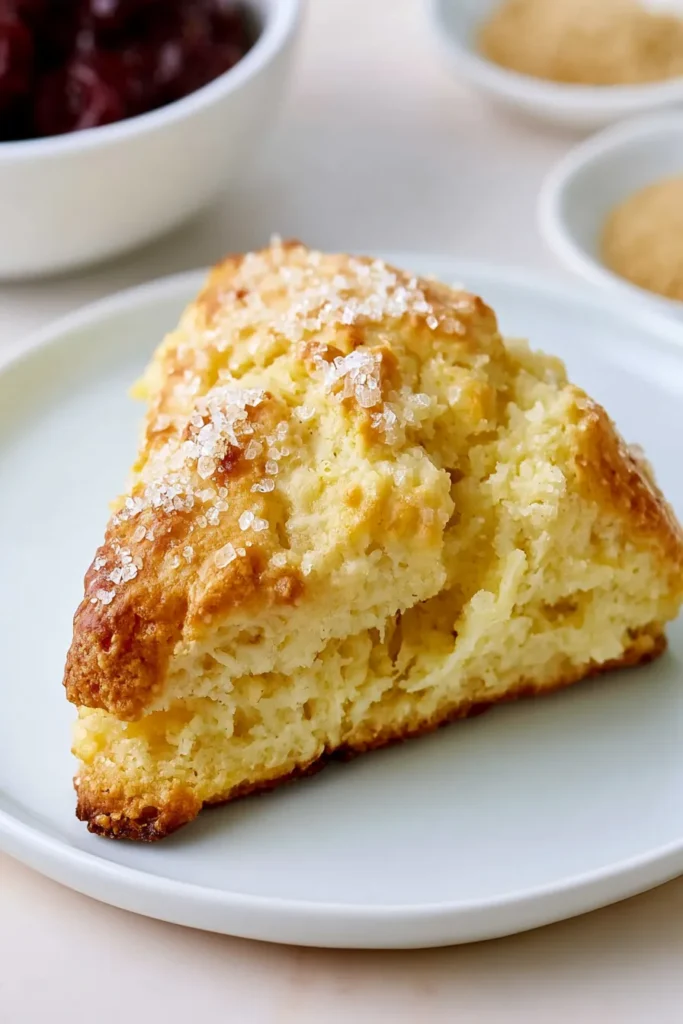
Bake for 12–15 minutes. Look for lightly browned tops and edges that have begun to firm. The centers should feel set rather than wet, though they’ll remain tender while warm.
Cold Ingredients and Gentle Handling for Better Texture
Warm butter blends into the flour too evenly. When that happens, the scones tend to spread more and lose some of their flaky texture. Keep the butter and buttermilk refrigerated until you’re ready to use them.
The finished mixture should still show visible butter pieces. If the kitchen is warm and the dough starts feeling soft or greasy, place the shaped wedges in the refrigerator for about 10 minutes before baking. A brief chill can help the butter stay solid until the oven heat reaches it.

Mixing deserves the same restraint. Once liquid touches flour, gluten begins developing. A few folds are useful; constant stirring isn’t. Stop as soon as the dough holds together, even if it looks a little shaggy.
When shaping, don’t press the rounds thin and then rebuild them. Form each one once, keeping it close to ¾ inch thick. Less handling gives you a softer center and cleaner layers.
Optional Lamination for Taller, Flakier Scones
Lamination sounds technical, though the home-kitchen version is simple. After turning the dough onto the floured surface, gently pat it into a thick rectangle. Fold one third toward the center, then fold the opposite third over it, much like folding a letter.
Turn the dough and repeat the fold once more if it still feels cold and firm. Two folds are enough. More can warm the butter and make the dough tough.
The folding stacks thin layers of dough and butter. As the scones bake, steam forms between those layers and encourages a taller rise. Worth the extra step when you want a more defined flaky crumb.
After folding, divide the dough into two equal pieces. Shape each into a 6-inch round, keeping the thickness near ¾ inch, and cut each round into eight wedges. Don’t roll the dough aggressively or press the edges flat. A lightly shaped round rises more freely.
Lamination is optional. The scones will still bake well without it, provided the butter stays cold and the dough isn’t overmixed.
Flavor Variations and Add-Ins
Add-ins work best when the dough is almost mixed. Fold in dried fruit, chopped nuts, chocolate, or another flavoring while a few streaks of flour are still visible. This gives everything enough time to spread through the dough without turning the mixture smooth and overworked.
Keep the amount moderate. About ¾ to 1 cup of add-ins is usually enough for this batch. Larger pieces should be chopped so they don’t tear through the wedges when you cut them.
For dried fruit, separate any pieces stuck together before adding them. Chocolate chunks should be small enough to stay inside the dough rather than falling from the cut edges. One or two gentle folds should do it.
Make-Ahead, Freezing, and Serving
Once the wedges are shaped, you can cover them and refrigerate them overnight. Keep them on the lined baking pan so they can go straight into the oven the next day. Brush with egg wash and add the coarse sugar just before baking.
For longer storage, freeze the unbaked wedges in an airtight container for up to 1 month. Place parchment between layers so the pieces don’t stick together. There’s no need to thaw them before baking. Arrange the frozen scones on the prepared pans and add about 2 minutes to the normal baking time.
Serve the scones warm or within a few hours of baking. That’s when the edges are crispest and the centers have the softest texture. Split one gently instead of cutting down hard through the crumb.

Frequently Asked Questions About Perfect Scones
Why did my scones spread while baking?
The butter may have softened before the scones reached the oven, or the dough may have contained too much liquid. Keep the butter and buttermilk cold, handle the dough lightly, and chill the shaped wedges for about 10 minutes if they feel soft.
How can I avoid dense or tough scones?
Mix only until the dough holds together and stop while it still looks slightly rough. Repeated stirring and kneading develop more gluten, which can make the centers firmer than intended.
Can I prepare the scones the night before?
Yes. Shape the wedges, cover them, and refrigerate them overnight. Add the egg wash and coarse sugar just before placing them in the 400°F oven.
Can unbaked scones go directly from the freezer to the oven?
Yes. Bake the frozen wedges without thawing and add about 2 minutes to the usual 12–15 minute baking time.
When should I add dried fruit, nuts, or chocolate?
Fold the add-ins into the dough when the wet and dry ingredients are nearly combined. Stop mixing once they are evenly distributed and the dough holds together.
A Warm Batch for the Table
The difference between tender scones and heavy ones often comes down to a few small choices: cold butter, gentle mixing, and a hot 400°F oven. Keep the dough a little rough and let the oven finish the work.
Serve them while they’re still warm, when the coarse sugar is crisp and the buttery layers pull apart easily.

Perfect Scones
Ingredients
Equipment
Method
- Adjust the oven rack to the center position, preheat the oven to 400°F, and line two baking pans with parchment paper.
- In a large mixing bowl, whisk together the flour, granulated sugar, salt, baking powder, and baking soda.
- Add the very cold butter and cut it into the flour with a pastry cutter or fork until most pieces are about the size of large peas.
- In a separate bowl, whisk together the cold buttermilk, one egg, and vanilla extract.
- Make a well in the dry ingredients, pour in the buttermilk mixture, and fold gently until the dough is just combined and still looks slightly rough.
- Fold in up to 1 cup of dried fruit, chopped nuts, or chocolate while a few streaks of flour remain, if using.
- Transfer the dough to a lightly floured surface and gently fold it like a letter once or twice for optional flaky layers, taking care not to warm or overwork it.
- Divide the dough into two equal portions and gently shape each portion into a 6-inch round about 3/4 inch thick.
- Cut each round into eight wedges and arrange the wedges about 2 inches apart on the prepared baking pans.
- Whisk the remaining egg with 1 teaspoon water, brush the mixture over the tops of the scones, and sprinkle with coarse sugar.
- Bake for 12 to 15 minutes, until the tops and edges are lightly browned and the centers feel set rather than wet.
- Let the scones cool briefly on the pans, then serve them warm or within a few hours of baking.
Notes
- Keep the butter and buttermilk refrigerated until needed so the butter remains solid in the dough.
- Stop mixing as soon as the dough holds together; a rough, slightly shaggy dough helps prevent dense scones.
- If the shaped wedges feel soft or greasy, refrigerate them for about 10 minutes before baking.
- Unbaked wedges may be covered and refrigerated overnight. Brush with egg wash and add coarse sugar just before baking.
- Freeze unbaked scones in an airtight container for up to 1 month. Bake directly from frozen and add about 2 minutes to the baking time.