Heavenly Red Velvet Cheesecake Balls You’ll Love
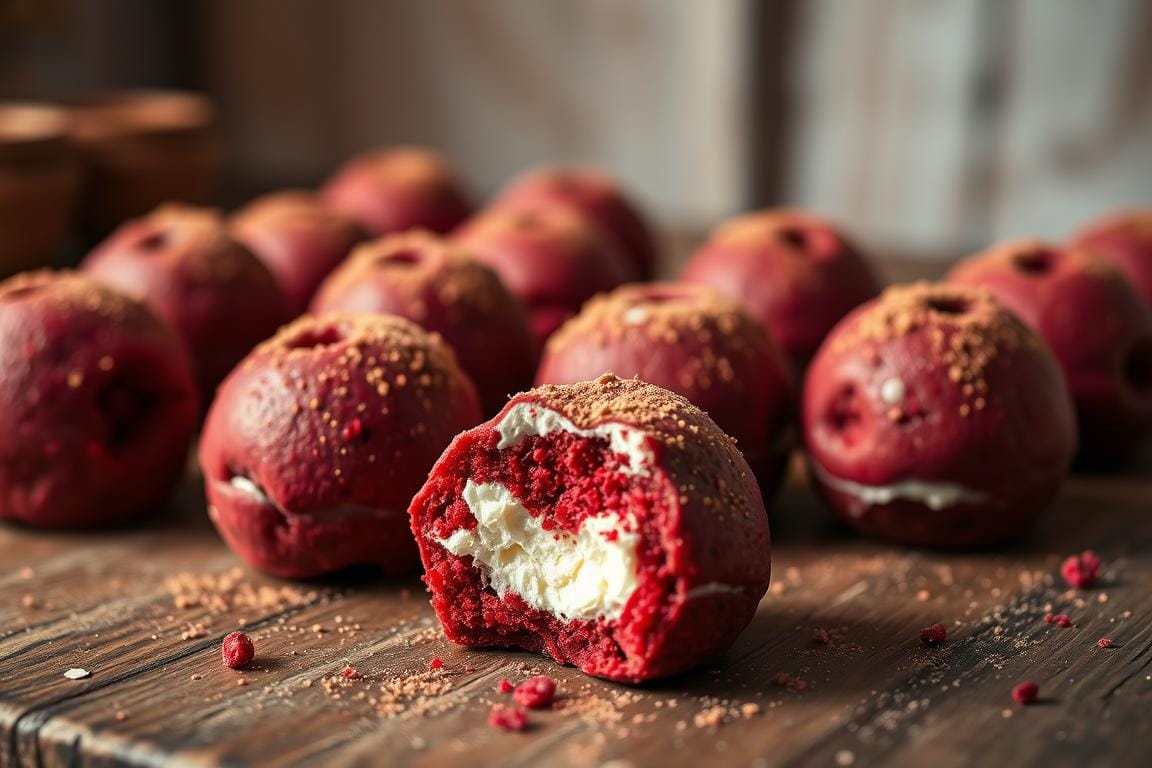
Imagine stepping into a kitchen filled with the scent of warm spices and creamy sweetness. Red velvet cheesecake balls offer tiny pieces of both tradition and innovation. They mix the tangy taste of cheesecake with the softness of red velvet.
These treats are not just for special occasions. They’re perfect whenever you want something tasty and easy to make.
Whether you’re new to baking or have years of experience, these bite-sized wonders are easy to make. They use common ingredients found in most kitchens. They’re great for holiday parties or as a quick gift, showing that homemade can be simple.
Key Takeaways
- Combine classic flavors into bite-sized red velvet cheesecake balls with minimal prep.
- Perfect for any occasion, from casual snacks to festive celebrations.
- They can be stored easily in the fridge or freezer for weeks, making them a pantry staple.
- Customizable with flavors like confetti or French vanilla for personal touches.
- Gluten-free options are available, ensuring everyone can enjoy this sweet tradition.
Introducing a Delightful Sweet Treat for Any Occasion
These festive dessert bites are perfect for any celebration. They’re an easy dessert recipe that makes 48 truffles in under 2 hours. Their bright red color and creamy texture make them a favorite at Christmas or romantic dinners.
- Party favors at baby showers.
- Gifts for coworkers or neighbors
- Quick snacks for family game nights
| Nutrient | Per Serving |
|---|---|
| Calories | 118 |
| Total Fat | 9g |
| Sugar | 9g |
| Protein | 1g |
Even beginners can make this dish with our easy dessert recipe steps. Here are some tips:
- Freeze truffles 10 minutes before dipping
- Use full-fat cream cheese for creaminess
- Store in airtight containers
These holiday treat bites are easy to make with five simple ingredients, like Duncan Hines cake mix and white chocolate chips. They’re as practical as they are pretty. Impress your guests without the hassle of complicated baking!
What Are Red Velvet Cheesecake Balls?
These treats mix two desserts into one amazing snack. Red velvet cheesecake balls have the tang of cream cheese and the deep cocoa of red velvet cake. They’re dipped in smooth chocolate. Their layered look and bright colors make them a hit at parties.
The Origin of Red Velvet Flavor
Red velvet comes from Southern baking. Its color comes from cocoa, vinegar, and buttermilk. Today, it balances chocolate with vanilla. The cream cheese filling adds a creamy touch to the cake.
How Cheesecake and Cake Balls Merged
Chefs mixed cake pops with cream cheese filling. They bake red velvet cake, mix crumbs with frosting, and add a chilled cream cheese core. A chocolate dip seals it. This makes a dessert that’s both old-fashioned and new.
Why They’ve Become So Popular
- They look great, making them popular on social media.
- You can coat them in different chocolates.
- They’re easy to make, so they need assembly and chilling.
They have a perfect balance of cake and filling. These treats are great for any occasion and show how simple ingredients can make something amazing.
Why These No-Bake Treats Will Become Your New Favorite
These no-bake desserts are a hit. They’re perfect for anyone, whether you’re new to baking or have years of experience. This easy dessert recipe makes impressive treats without the hassle of hard-to-follow steps. Here’s why you should give them a try.
Perfect for Beginners and Experienced Bakers Alike
- Use store-bought red velvet cake mix to skip from-scratch baking
- A simple mixing and rolling process requires no advanced techniques
- Experienced bakers can customize fillings or coatings for creative flair
Time-Saving Benefits
| Prep Time | 20 minutes |
|---|---|
| Assembly Time | 15 minutes |
| Storage Ready | 24 hours ahead |
| Total Yield | 24 bites |
These treats save a lot of time. They use pre-made cake mixes and don’t need to bake. Just chill them for 30 minutes, and they’re ready to impress.
Impressive Results with Minimal Effort
“I made these for a dinner party and everyone thought I’d spent hours baking!”
You can make these bites look amazing even if you’re not a pro. Just mix, chill, and roll. Then, coat them with crushed graham crackers for a fancy touch. They’re great for any sudden party or holiday event.
Essential Ingredients for Perfect Red Velvet Cheesecake Balls
Making homemade red velvet cheesecake balls needs top-notch ingredients. Start with a boxed red velvet cake mix and the needed items, like oil and water. Then, add 8 ounces of full-fat cream cheese. These two are key for a smooth, creamy texture.
Don’t use low-fat cream cheese, which makes the balls too soft. Mix in ½ cups powdered sugar, one teaspoon vanilla extract, and some heavy cream or milk for consistency.
- Cake mix: Choose store-bought for ease or a homemade recipe for more control.
- Cream cheese: Brick-style is best for richness; ensure it’s softened to room temperature for mixing.
- Coating options: Use chocolate coatings like white chocolate chips or candy melts for a shiny look. Add a teaspoon of coconut oil to the coatings for easier spreading.
“Full-fat cream cheese is non-negotiable for that signature melt-in-your-mouth texture,” say professional bakers.
Adding extras like espresso powder or cinnamon can enhance flavor. For coatings, try crushed red velvet cake crumbs or mini chocolate chips. If you need gluten-free, use certified gluten-free cake mixes and cream cheese.
Chill the mixture for 1 hour before shaping into 1-inch balls. Taste the mixture before rolling to adjust the sweetness.
Pro tip: Keep coatings at 85-90°F to avoid cracking. Store leftovers in an airtight container for up to 3 days or freeze for 1 month. Now, you’re all set to start making!
Kitchen Tools You’ll Need
Making these no-bake treats at home is easy. You don’t need a fancy kitchen. Basic tools will help you make delicious, easy dessert recipes quickly. Start by getting the essentials, and see how everyday items can be as good as special tools.
Must-Have Equipment
- Mixing bowls (2 medium)
- Hand mixer or stand mixer
- Measuring cups and spoons
- Baking sheet lined with parchment paper
- Small cookie scoop (1-ounce size) or spoon
Optional Tools That Make It Easier
- Candy dipping tool (for smooth chocolate coatings)
- Silicone baking mat (prevents sticking)
- Cooling rack (lets coatings set without smudging)
Substitutes for Specialized Equipment
| Specialized Tool | Home Substitute |
|---|---|
| Candy dipping tool | Fork for drizzling chocolate |
| Silicone mat | Parchment paper on a baking sheet |
| Cookie scoop | Tablespoon measure for portioning dough |
You can make perfect homemade bites without fancy tools. Use a microwave-safe bowl as a double boiler, or spoon batter onto wax paper for shaping. Each tool listed helps you succeed with little cost. Keep your pantry stocked and let your creativity shine in your no-bake creations.
Step-by-Step Recipe for Red Velvet Cheesecake Balls
Make homemade red velvet cheesecake balls in just 40 minutes with these easy steps. This is an easy dessert recipe that everyone will love.
- Preheat the oven to 350°F. Bake the red velvet cake mix according to the box instructions (usually 25-30 minutes). Let it cool completely.
- Crumble the cooled cake into a big bowl. Mix in softened cream cheese, powdered sugar, and vanilla until smooth. Chill for 1 hour.
- Roll the chilled dough into 1½-inch balls (you’ll get about 50). Freeze them for 15-20 minutes to firm them up.
- Melt chocolate in a double boiler. Dip the frozen balls with toothpicks, removing extra chocolate. Put them on parchment paper and chill to harden for 20-30 minutes.
| Per Serving (1 ball) | Calories | Carbs | Protein | Fat |
|---|---|---|---|---|
| 74 kcal | 13g | 1g | 3g | |
| Total Yield | 50 pieces | |||
- For gluten-free options, use boxed gluten-free red velvet mixes
- Try different coatings like crushed candy canes or coconut flakes
- Freeze leftovers in airtight containers for up to 3 months
These small treats are great with coffee or tea. You can make them sweeter by adding more powdered sugar. Enjoy your homemade treats at parties or as a quick snack!
The Secret to Getting the Perfect Texture Every Time
Getting the right texture for your no-bake red velvet cheesecake balls is key. Always pick full-fat cream cheese for a rich, smooth base. Avoid overmixing or under-chilling to keep the texture perfect.
- Use finely ground red velvet cake crumbs to bind the filling without crumbling.
- Bring cream cheese to room temperature before mixing to avoid lumps.
- Chill the mixture between rolling and coating for at least 30 minutes to hold its shape.
| Factor | Why It Matters | Fix It |
|---|---|---|
| Cream Cheese Type | Low-fat options make the balls soggy. | Choose full-fat varieties. |
| Chilling Time | Ensures the mixture holds its shape. | Chill 1 hour before rolling. |
| Cake Crumb Size | Larger crumbs cause cracks. | Grind crumbs in a food processor. |
A delicious bite needs balance. If the dough is too sticky, add 1 tbsp flour. Too crumbly? A teaspoon of butter helps. Adjust as needed and test a small batch first. These tips ensure every batch is a hit.
Pro Tips for Irresistible Results
With these expert tips, make your red velvet cheesecake balls stand out. Every step, from mixing to decorating, is key. Follow these steps for a delicious and festive dessert that will wow everyone.
Achieving the Right Consistency
Use room-temperature cream cheese for smooth mixing. If the dough is too dry, add a teaspoon of heavy cream. If it’s too sticky, add a pinch of flour. Chill the dough 15–20 minutes before shaping to keep its shape.
- Warm cream cheese (but not melted) blends seamlessly with other ingredients.
- Test the texture by rolling a small portion. If it sticks, refrigerate it longer.
Coating Techniques for a Flawless Finish
Freeze the formed balls 10 minutes before dipping. Melt chocolate gently over a double boiler, stirring until smooth. Dip each ball halfway, then let excess drip off before placing on a parchment-lined tray. For a glossy coat, dip twice—a thin layer first, let set, then a second thicker layer.
- Work in small batches to keep the chocolate fluid.
- Use a fork to drizzle extra chocolate for a textured finish.
Decorating Ideas That Wow
Turn balls into a festive dessert with these ideas:
- Color contrast: Drizzle white chocolate over dark chocolate coatings for a modern look.
- Seasonal sparkle: Top with gold leaf, crushed candy canes, or edible holiday glitter.
- Layered effects: Dip half in cocoa powder and half in sprinkles for a playful touch.
Use ingredients like store-bought melted chocolate chips or high-quality dark chocolate for a richer flavor. The result? Bites that look as good as they taste.
Exciting Flavor Variations to Try
Make your red velvet cheesecake balls a holiday hit with new twists. Each variation keeps the taste great while exploring new flavors. Start with the classic recipe, then try these creative ideas:
| Flavor | Key Ingredients | Pro Tip |
|---|---|---|
| White Chocolate & Raspberry | White chocolate coating, freeze-dried raspberries | Add 1 tsp raspberry powder for intensity |
| Peanut Butter Twist | Peanut butter, milk chocolate | Chill 30 mins extra to firm mixture |
| Mint Chocolate | Mint extract, dark chocolate | Use ½ tsp extract to avoid overpowering |
| Seasonal | Pumpkin spice, citrus zest | Pair with seasonal coatings like green for spring |
White Chocolate and Raspberry
Coat balls in melted white chocolate, then roll in crushed raspberries. Add ¼ cup raspberry preserves for a vibrant touch. Reduce sugar in the base by 1 tbsp to balance the sweetness.
Peanut Butter Twist
Roll balls in smooth peanut butter before dipping them in milk chocolate. Mix in 2 tbsp peanut butter for layered flavor. If they are too soft, chill for 15 extra minutes.
Mint Chocolate Version
Add ½ tsp peppermint extract to the batter. Dip in dark chocolate and sprinkle with crushed candy canes. Store in an airtight container to keep fresh.
Seasonal Flavor Inspirations
For fall, Mix in pumpkin pie spice and garnish with cinnamon sugar. For summer, add orange zest and coat it with dark chocolate. For a festive treat on a holiday, try peppermint extract with white chocolate coating.
- Winter: Peppermint extract + crushed candy cane pieces
- Spring: Lemon zest + green candy melts
- Summer: Mango puree + coconut flakes
Always test a small batch before scaling up. If the mix becomes too moist, adjust the liquid content by 1 tsp.
How to Store Your Cheesecake Balls
Keeping your homemade no-bake treats fresh is important. They have cream cheese, so they need to be refrigerated. Here’s how to keep them fresh:
- Refrigerator Storage: Put the balls in an airtight container, using parchment paper between layers. They will stay good for up to four days in the fridge.
- Freezing Tips: First, freeze them on a baking sheet. Then, put them in freezer-safe bags. They can last 3 months in the freezer. Don’t forget to label the bags with the date.
- Thawing: To keep their texture, move frozen balls to the fridge 24 hours before you want to eat them. Never thaw them at room temperature.
Pro tip: Use small containers for easy serving. For an easy dessert recipe, make batches ahead and freeze them. But don’t stack them too tightly to avoid crumbling.
Always keep them chilled before serving. This way, they’ll stay creamy and delicious, whether you’re serving them right away or weeks later.
Creative Ways to Serve These Festive Dessert Bites
Make your homemade holiday treats stand out at any party. Red velvet cheesecake balls look amazing when presented well. Here are some tips to make them even more appealing:
Holiday Party Presentations
Bring joy to parties with these festive ideas:
- Arrange in geometric patterns, clusters, or pyramid shapes for visual impact.
- Place on mirrored boards or marble slabs for a modern look.
- Stack on gingerbread house displays or Christmas tree stands.
Tip: Add edible gold dust or peppermint sprigs for a holiday feel. Southern Living says geometric displays are up 40% in 2023.
Gift-Giving Ideas
Turn your treats into gifts:
| Container Type | Decoration Idea | Storage Note |
|---|---|---|
| Mason jars | Ribbon-wrapped with cinnamon stick accents | Include a “Refrigerate for 3 days” tag |
| Mini tins | Wrap in foil with handwritten labels | Freeze up to 2 months |
| Clear boxes | Add glittered bows and recipe cards | Pair with peppermint hot chocolate packets |
Elegant Dessert Platter Arrangements
Follow these styling tips for a professional look:
- Alternate red velvet balls with white chocolate-dipped versions for contrast.
- Use edible gold leaves or candied cranberries as accents.
- Balance with mini macarons or chocolate Santas for cohesive color schemes.
Pro tip: Place platters on mirrored platforms or draped with velvet fabric for upscale events.
“Perfecting presentation turns ordinary bites into memorable moments.”
Whether hosting a cookie exchange or giving gifts to neighbors, these ideas will make your homemade treats the highlight of any celebration.
Troubleshooting Common Issues When Making Cheesecake Balls
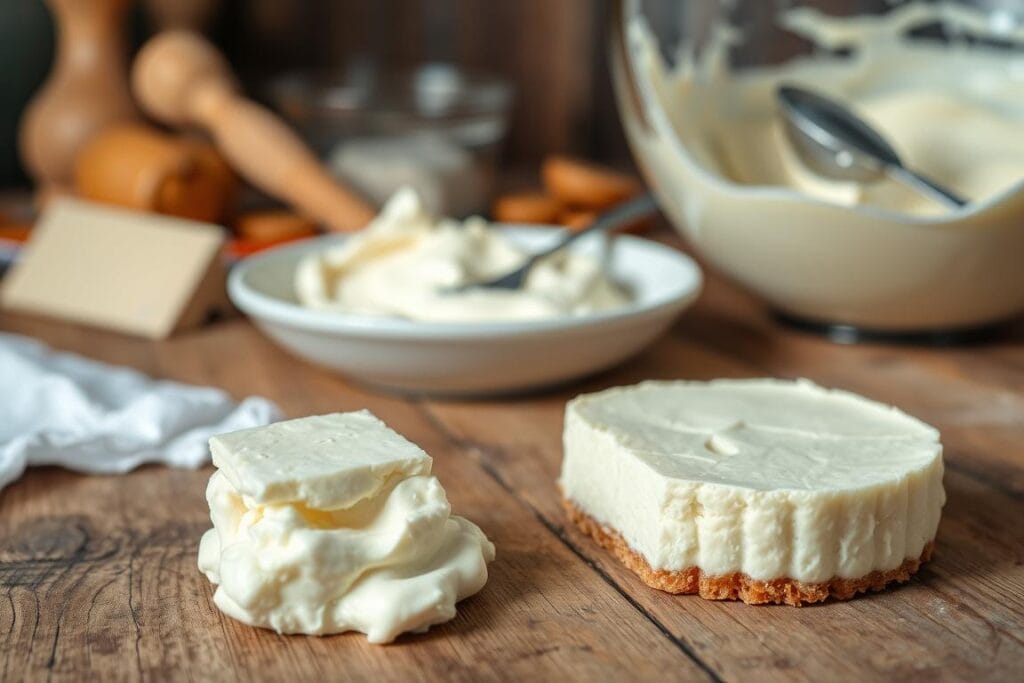
Homemade cream cheese desserts like these red velvet cheesecake balls are simple to make, but can sometimes present minor hurdles. Here’s how to fix common issues and perfect your easy dessert recipe:
| Problem | Cause | Solution |
|---|---|---|
| Runny cream cheese filling | Overmixing or undercooking | Add 1-2 tbsp cornstarch or extra powdered sugar to thicken |
| Grind the crumbs finely and press firmly when rolling | Room temperature storage | Store in an airtight container in the fridge until serving |
| Crumbs falling off | Coarse crumbs or weak mixture | Overcooking or a lack of flexibility |
| Cracked chocolate coating | Overcooking or lack of flexibility | Melt chocolate with 1 tsp coconut oil for smoothness |
- Test coatings by dipping a ball first to check consistency
- Refrigerate mixtures 1 hour before rolling to firm up
- Use parchment paper to prevent sticking while shaping
Remember: even small adjustments like chilling times or ingredient ratios make a big difference. These fixes ensure your homemade treats stay intact and flavorful. With these tips, you’ll master this easy dessert recipe confidently!
Nutritional Information and Dietary Adaptations
Each red velvet cheesecake ball has 120–145 calories, making it a lighter choice than a full slice of cake. Because they balance taste with portion size, they are perfect for sharing at parties.
- Gluten-free option: Use Bob’s Red Mill Gluten-Free Red Velvet Cake Mix instead of regular cake mix.
- Dairy-free version: Replace Tofutti Better Than Cream Cheese and Enjoy Life dark chocolate chips.
- Sugar-conscious choice: Cut sugar in half with Swerve Sweetener for 30% less sugar without losing moisture.
Important note: Most recipes include dairy, wheat, and chocolate, which contain soy lecithin. For nut-free events, avoid almond flour and use sunflower seed butter.
Try pairing these holiday treat versions with peppermint or white chocolate drizzle. Swaps might change texture, but using 1:1 ratios for dairy-free cream cheese keeps results consistent.
Remember that gluten-free mixes might need extra binding agents like xanthan gum when making dietary changes. For vegan red velvet cheesecake balls, test with Daiya for melted coatings.
Conclusion
Red velvet cheesecake balls are a tasty treat for any festive event. They mix tangy cake, creamy filling, and chocolate for a delightful taste. These bite-sized treats are perfect for birthdays, holidays, or just hanging out with friends.
They’re easy to make, even for beginners. Use store-bought cake mixes and follow simple steps. You can also change the flavors or add different coatings, like mint or peanut butter, making each batch special and unique.
These desserts are great for holiday platters or as gifts. They keep well in the fridge or freezer for weeks. You can even make them gluten-free or use dairy alternatives for everyone to enjoy.
When making them, chill the dough first for clean coatings. Use toothpicks to handle them easily. They’re perfect for any time of year, from Christmas to summer picnics.
By following this guide, you’ll learn to make a dessert that’s both classic and new. It’s a recipe that fits any occasion, turning simple ingredients into unforgettable treats.
FAQ
What are red velvet cheesecake balls?
Red velvet cheesecake balls are small treats. They mix red velvet cake with creamy cheesecake. This makes a festive and tasty dessert that’s easy to make.
Do I need to bake these cheesecake balls?
No, these are no-bake desserts. This makes them easy to prepare. You can enjoy a delicious dessert with little effort and time.
What ingredients do I need for red velvet cheesecake balls?
You’ll need full-fat cream cheese and red velvet cake. You can use a mix or bake it from scratch. Also, you’ll need chocolate for coating. The quality of these ingredients affects the taste and texture.
How long do red velvet cheesecake balls last in the refrigerator?
They can last 3-4 days in the fridge. Keep them in an airtight container to stay fresh.
Can I make these cheesecake balls in advance?
Yes, you can make them ahead of time. They’re great for holiday gatherings or parties. Store them in the fridge or freeze for longer.
Are there any dietary adaptations for red velvet cheesecake balls?
Yes, you can adapt them. Try gluten-free cake mixes, dairy-free cream cheese, or sugar substitutes. This makes them suitable for different diets.
What coating options do I have for these cheesecake balls?
You can coat them in white, dark chocolate, or candy melts. You can also roll them in cake crumbs, nuts, or sprinkles. This adds a festive touch.
How can I enhance the presentation of my red velvet cheesecake balls?
Arrange them on a decorative platter or use seasonal garnishes. You can also package them in fun gift boxes. Creative presentation makes these treats special for any occasion.

Heavenly Red Velvet Cheesecake Balls You’ll Love
- Total Time: 1 hour
- Yield: 50 pieces 1x
- Diet: Vegetarian
Description
These no-bake red velvet cheesecake balls are creamy, tangy, and dipped in smooth chocolate for the perfect bite-sized dessert. With a vibrant red hue and a rich cheesecake filling, they’re ideal for holidays, gifts, and quick treats. Simple to make and endlessly customizable, they blend tradition and creativity in every bite.
Ingredients
1 box red velvet cake mix (plus ingredients to prepare: eggs, oil, water)
8 oz full-fat cream cheese, softened
½ cup powdered sugar
1 tsp vanilla extract
1 tbsp heavy cream or milk (optional, for texture)
2 cups white chocolate chips or candy melts
1 tsp coconut oil (optional, for coating consistency)
Instructions
-
Bake the red velvet cake as directed on the box. Let it cool completely.
-
Crumble the cooled cake into a large bowl.
-
Mix in softened cream cheese, powdered sugar, and vanilla extract until smooth. Chill for 1 hour.
-
Roll mixture into 1½-inch balls (makes about 50). Freeze for 15–20 minutes.
-
Melt chocolate with coconut oil in a double boiler or microwave.
-
Dip frozen balls into melted chocolate, let excess drip off.
-
Place on parchment paper and chill until set (20–30 minutes).
-
Serve or store in the fridge or freezer.
Notes
Use full-fat cream cheese for the best texture.
Adjust the texture with cream if the mixture is dry or a touch of flour if it’s too wet.
Add flavor variations like peppermint, raspberry, or peanut butter.
For gluten-free: use a certified gluten-free red velvet cake mix.
Store in an airtight container: 3–4 days in the fridge, up to 3 months frozen.
- Prep Time: 20 minutes
- Cook Time: 30 minutes (baking cake + chilling + coating)
- Category: Dessert
- Method: No-Bake + Dipping
- Cuisine: American
What Are Our Readers Saying?
There are no reviews yet. Be the first one to write one.

