Baked Salmon Sushi – The Viral Comfort Food You’ll Want Every Week
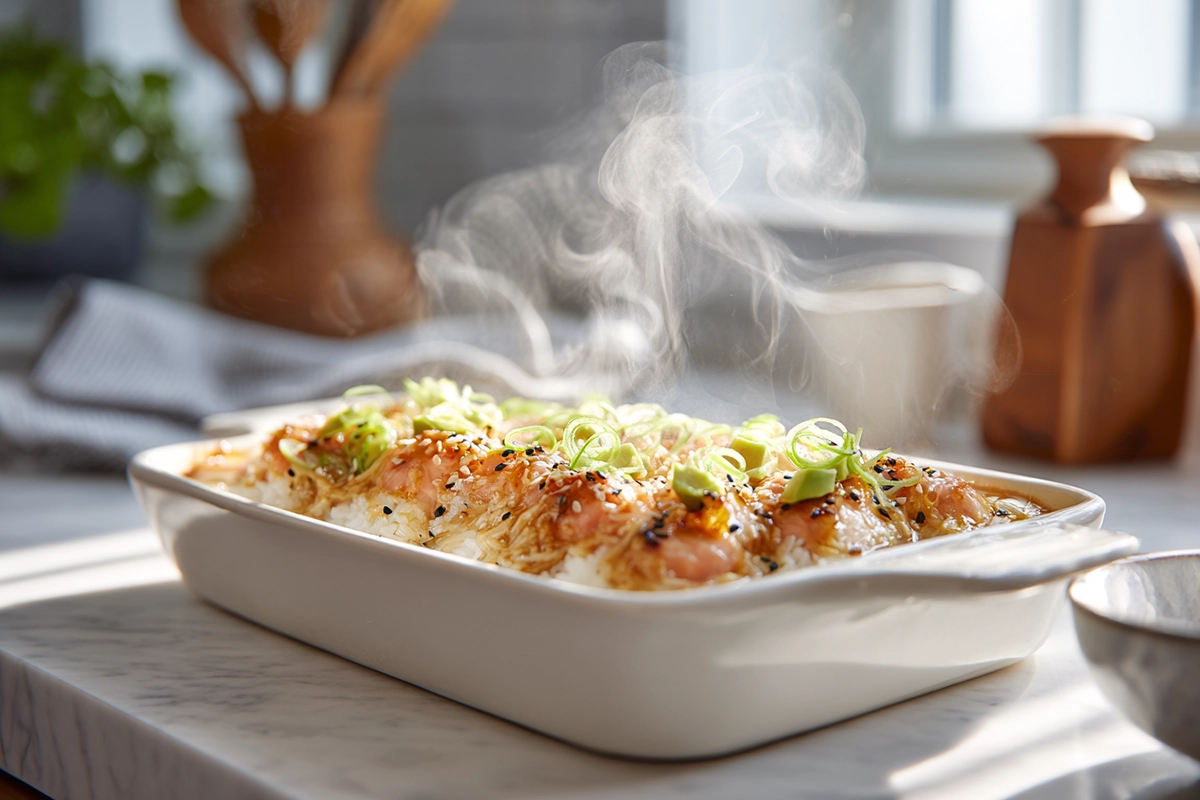
There’s something magical about discovering a dish that’s both indulgent and easy to make. The first time I tried baked salmon sushi, I didn’t expect it to hit every craving at once—creamy, savory, slightly tangy, and perfectly comforting. It’s like sushi’s cozy cousin, bringing all the flavors you love into a warm, shareable casserole that’s ideal for family dinners or casual get-togethers.
If you’ve ever wished sushi night could feel a little more relaxed (and a lot less about perfect rolling technique), this dish is your answer. Baked salmon sushi takes the essence of your favorite rolls and transforms them into a hearty, oven-baked meal that’s impossible to mess up and even harder to resist.
What Is Baked Salmon Sushi?
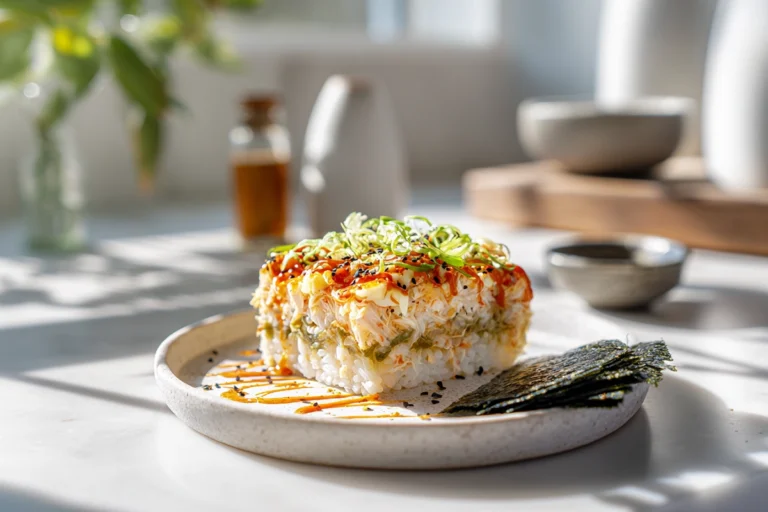
Imagine your favorite sushi roll—but instead of delicate slices wrapped in seaweed, you’ve got layers of tender rice, savory salmon, and a creamy, spicy topping baked until golden and bubbling. That’s baked salmon sushi in a nutshell: a deconstructed sushi roll that feels both familiar and entirely new.
This dish first gained traction online, with food creators showcasing their “sushi bakes” that quickly went viral. It’s now become a staple for home cooks who want to enjoy sushi flavors without needing a bamboo mat or precision knife skills. The beauty of this recipe lies in its simplicity: a comforting balance of sweet, salty, creamy, and umami-rich layers that come together in one pan.
When you serve it, everyone can scoop out portions and wrap them in small nori sheets or enjoy them straight from the dish. It’s communal, customizable, and deeply satisfying—everything that comfort food should be.
Print
Baked Salmon Sushi
- Total Time: 45 minutes
- Yield: 6 servings 1x
- Diet: Gluten Free
Description
This baked salmon sushi is a comforting twist on traditional sushi rolls, combining creamy salmon, seasoned rice, and savory toppings in one easy oven-baked dish. It’s rich, flavorful, and perfect for sharing during family dinners or gatherings.
Ingredients
For the Sushi Rice Base:
2 cups cooked short-grain sushi rice
2 tablespoons rice vinegar
1 tablespoon sugar
½ teaspoon salt
For the Salmon Mixture:
1 lb (450 g) fresh salmon fillet, skin removed
2 tablespoons soy sauce (or tamari for gluten-free)
1 teaspoon sesame oil
2 tablespoons Japanese mayonnaise (Kewpie)
1 tablespoon cream cheese, softened
1 teaspoon sriracha (optional)
1 tablespoon chopped green onions
For Topping & Garnish:
2 tablespoons furikake seasoning
1 avocado, sliced
1 small cucumber, thinly sliced
1 tablespoon sesame seeds
Seaweed sheets (nori) for serving
Instructions
-
Cook the salmon: Preheat oven to 375°F (190°C). Brush the salmon with soy sauce and sesame oil, then bake for 12–15 minutes. Once done, flake it with a fork.
-
Prepare the rice: In a small bowl, mix rice vinegar, sugar, and salt until dissolved. Fold into warm cooked rice gently to coat evenly.
-
Assemble the layers: Spread the rice evenly in a lightly greased baking dish. Sprinkle furikake seasoning over it. Mix the flaked salmon with mayonnaise, cream cheese, sriracha, and green onions, then spread the mixture over the rice.
-
Bake the sushi: Bake for 10–12 minutes until the top is lightly golden and bubbling. Optionally, broil for 1–2 minutes for a crisp finish.
-
Garnish and serve: Top with avocado, cucumber, and sesame seeds. Serve warm with nori sheets for wrapping.
Notes
For a gluten-free version, use tamari instead of soy sauce and ensure your furikake is gluten-free.
You can replace salmon with imitation crab, shrimp, or even tofu for variation.
Assemble ahead of time and refrigerate before baking for easy meal prep.
Avoid freezing, as the rice and mayo mixture may lose texture after thawing.
- Prep Time: 20 minutes
- Cook Time: 25 minutes
- Category: Main Course
- Method: Baked
- Cuisine: Japanese Fusion
Nutrition
- Serving Size: 1 portion (1/6 of recipe)
- Calories: 385 kcal
- Sugar: 3 g
- Sodium: 670 mg
- Fat: 21 g
- Saturated Fat: 5 g
- Unsaturated Fat: 14 g
- Trans Fat: 0 g
- Carbohydrates: 29 g
- Fiber: 2 g
- Protein: 22 g
- Cholesterol: 60 mg
Ingredients and Key Components
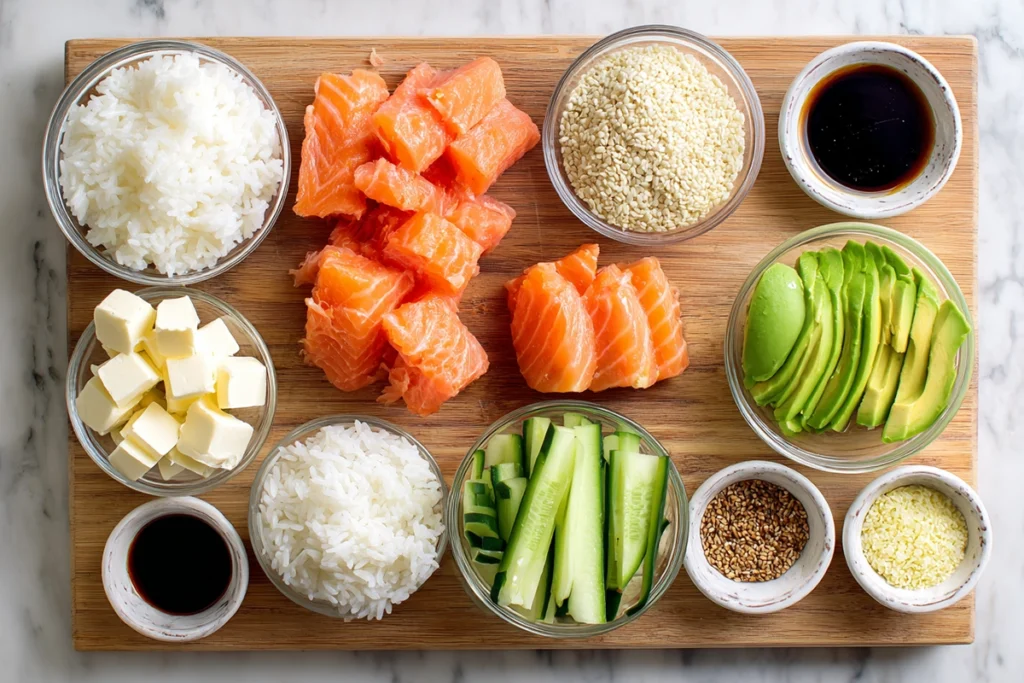
The magic of baked salmon sushi comes from a few simple ingredients that work together beautifully. You’ll find most of these items in your regular grocery store, though a quick trip to the Asian aisle or a local market will elevate your flavors even more.
For the Sushi Rice Base
- 2 cups cooked short-grain sushi rice
- 2 tablespoons rice vinegar
- 1 tablespoon sugar
- ½ teaspoon salt
For the Salmon Mixture
- 1 lb (450 g) fresh salmon fillet, skin removed
- 2 tablespoons soy sauce (or tamari for gluten-free)
- 1 teaspoon sesame oil
- 2 tablespoons Japanese mayo (Kewpie)
- 1 tablespoon cream cheese, softened
- 1 teaspoon sriracha (optional for spice)
- 1 tablespoon chopped green onions
For Topping & Garnish
- 2 tablespoons furikake seasoning
- 1 avocado, sliced
- 1 small cucumber, thinly sliced
- 1 tablespoon sesame seeds
- Seaweed sheets (nori) for serving
Step-by-Step Preparation
Cook and Flake the Salmon
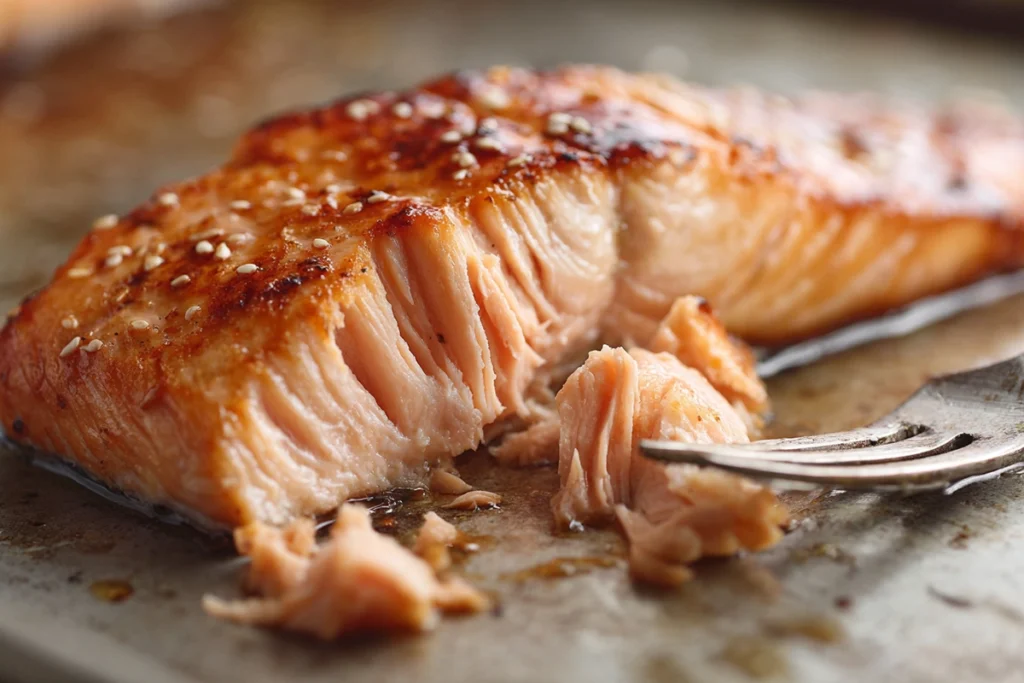
Preheat your oven to 375°F (190°C). Place the salmon fillet on a baking tray lined with foil, brush it lightly with soy sauce and sesame oil, then bake for 12–15 minutes until fully cooked. Once cooled slightly, flake the salmon into small pieces with a fork.
Prepare the Sushi Rice
While the salmon bakes, combine the rice vinegar, sugar, and salt in a small bowl until dissolved. Gently fold this mixture into warm rice. Avoid mashing—it’s all about keeping that signature sticky yet fluffy texture.
Assemble the Layers
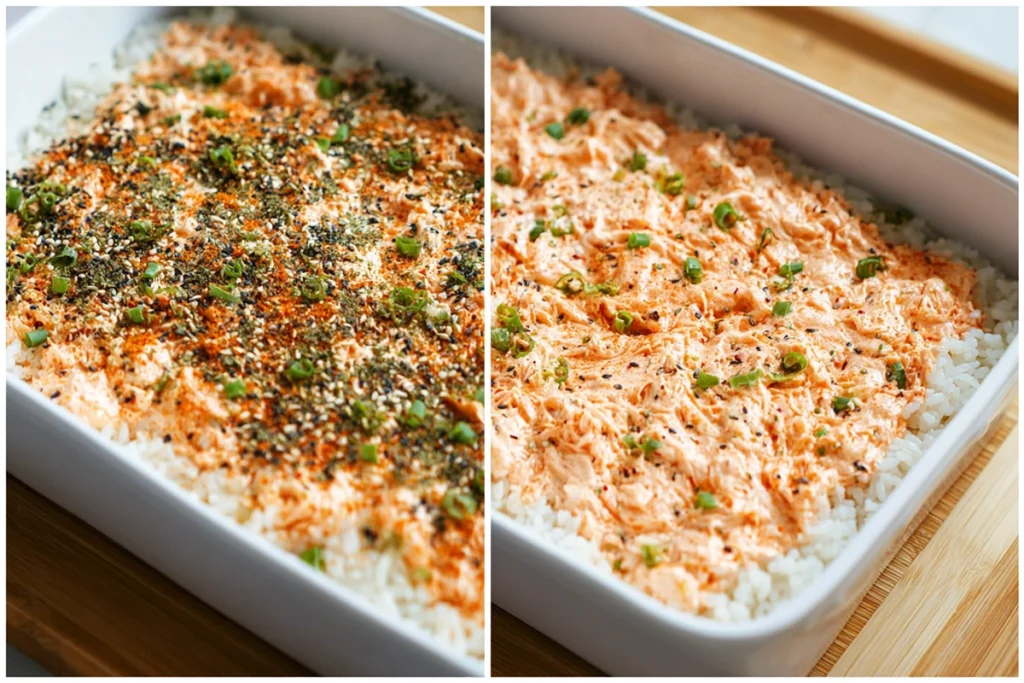
Spread the seasoned rice evenly at the bottom of a lightly greased baking dish. Sprinkle a layer of furikake over it for extra flavor and crunch. Mix your flaked salmon with Kewpie mayo, cream cheese, and sriracha until creamy and smooth. Spread this mixture over the rice layer.
Bake to Perfection
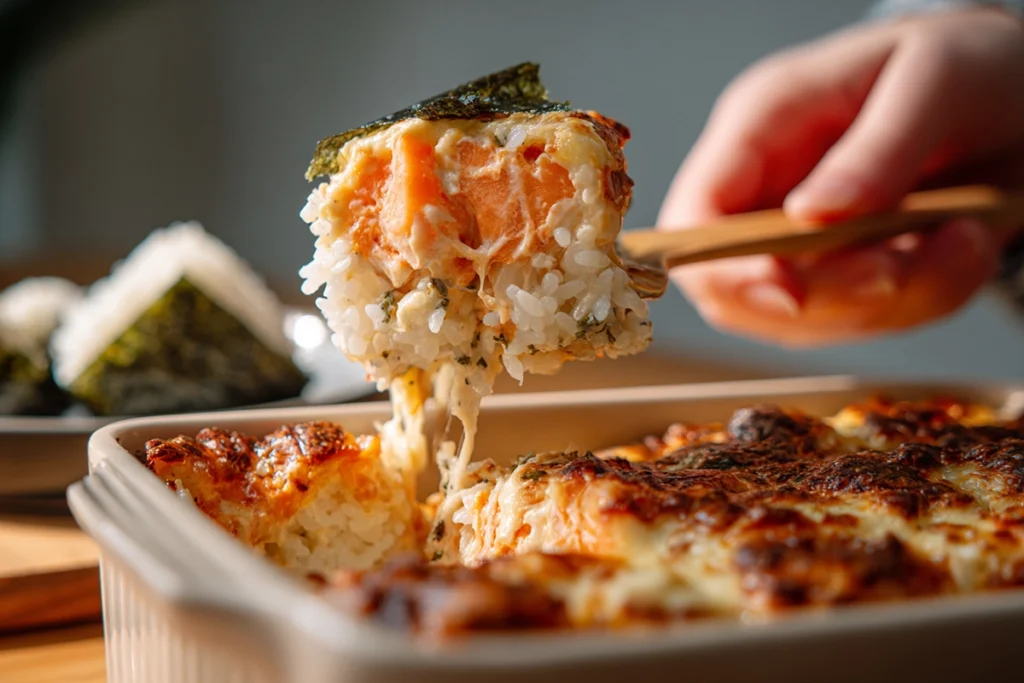
Bake uncovered for 10–12 minutes, or until the top starts to bubble and turn slightly golden. For an extra toasted finish, switch the oven to broil mode for about 2 minutes—but keep an eye on it, as it browns quickly.
Garnish and Serve
Top your baked sushi with thinly sliced avocado, cucumber, and a sprinkle of sesame seeds. To eat, scoop out a portion and wrap it in a piece of nori, or enjoy it as-is with chopsticks. Either way, the flavors come together in a deliciously rich bite that rivals any restaurant roll.
Dietary Variations and Substitutions
Every kitchen has its own set of dietary preferences, and baked salmon sushi is wonderfully adaptable. Whether you’re cutting back on calories or keeping things plant-based, here’s how you can make it work for you:
Gluten-Free
Swap the soy sauce for tamari or coconut aminos. Make sure your furikake seasoning doesn’t contain gluten (some brands do).
Dairy-Free
Use vegan cream cheese and dairy-free mayo. A mix of cashew cream and sriracha makes a surprisingly good substitute for the creamy salmon layer.
Vegan
Replace salmon with a mixture of mashed chickpeas, nori flakes, and smoked paprika. It mimics the flavor and texture beautifully while keeping the dish 100% plant-based.
Low-Calorie or High-Protein
Use Greek yogurt instead of cream cheese for a lighter version. Swap some of the rice for cauliflower rice to cut down carbs without losing volume.
Halal
Opt for halal-certified salmon and sauces. Kewpie mayo contains rice vinegar, so it’s typically fine, but always check the label to confirm.
By adjusting these elements, you can make this sushi bake fit seamlessly into nearly any diet plan without sacrificing flavor.
Variations and Serving Ideas
Once you’ve mastered the basic version, it’s fun to experiment. Try adding imitation crab or shrimp for a surf-and-surf variation. A drizzle of teriyaki glaze before baking gives a sweet-savory twist. For parties, scoop the mixture into muffin tins to create individual sushi cups that guests can grab easily.
You can also serve this in a deconstructed bowl format with extra veggies—think of it as a “sushi bowl meets casserole.” Pair it with miso soup or edamame on the side for a complete, balanced meal.
Storage and Reheating Tips
If you somehow end up with leftovers, don’t worry—baked salmon sushi reheats well. Store it in an airtight container in the refrigerator for up to 3 days. When reheating, use the oven or an air fryer for 5–7 minutes at 350°F to restore the crispy top. The microwave works too, but it might make the rice softer.
Freezing isn’t ideal since the rice and mayo layer can lose their texture, but you can prep the components ahead and assemble just before baking for a faster weeknight dinner.
There’s something incredibly comforting about the first warm bite of baked salmon sushi—that mix of creamy, tangy, and savory layers that melt together perfectly. It’s everything you love about sushi, just without the fuss. Whether you’re hosting a weekend dinner or craving something new, this recipe brings that restaurant-quality experience straight to your table in the most approachable way possible.
FAQ
Can I use canned salmon for baked salmon sushi?
Yes, you can! Canned salmon works well if you’re short on time. Just drain it and mix with the mayo, cream cheese, and seasonings as you would with fresh salmon. The texture is slightly softer, but it still tastes great.
Is baked salmon sushi served hot or cold?
It’s best served warm, straight from the oven. The creamy salmon layer and seasoned rice taste their best when slightly hot. However, leftovers can also be enjoyed cold for a quick next-day meal.
What kind of rice should I use for baked salmon sushi?
Use short-grain sushi rice for the ideal sticky texture. If you can’t find it, medium-grain rice will work, but avoid long-grain varieties—they won’t hold together as well.
How can I make baked salmon sushi spicier?
For extra heat, mix more sriracha or chili oil into your salmon filling, or drizzle spicy mayo on top before baking. You can also sprinkle crushed red pepper flakes for a bold kick.
Can I prepare baked salmon sushi ahead of time?
Absolutely. You can assemble the dish a few hours before baking and store it in the fridge. When you’re ready, just pop it in the oven until hot and bubbly—it’s perfect for entertaining or meal prep.
What Are Our Readers Saying?
There are no reviews yet. Be the first one to write one.

