
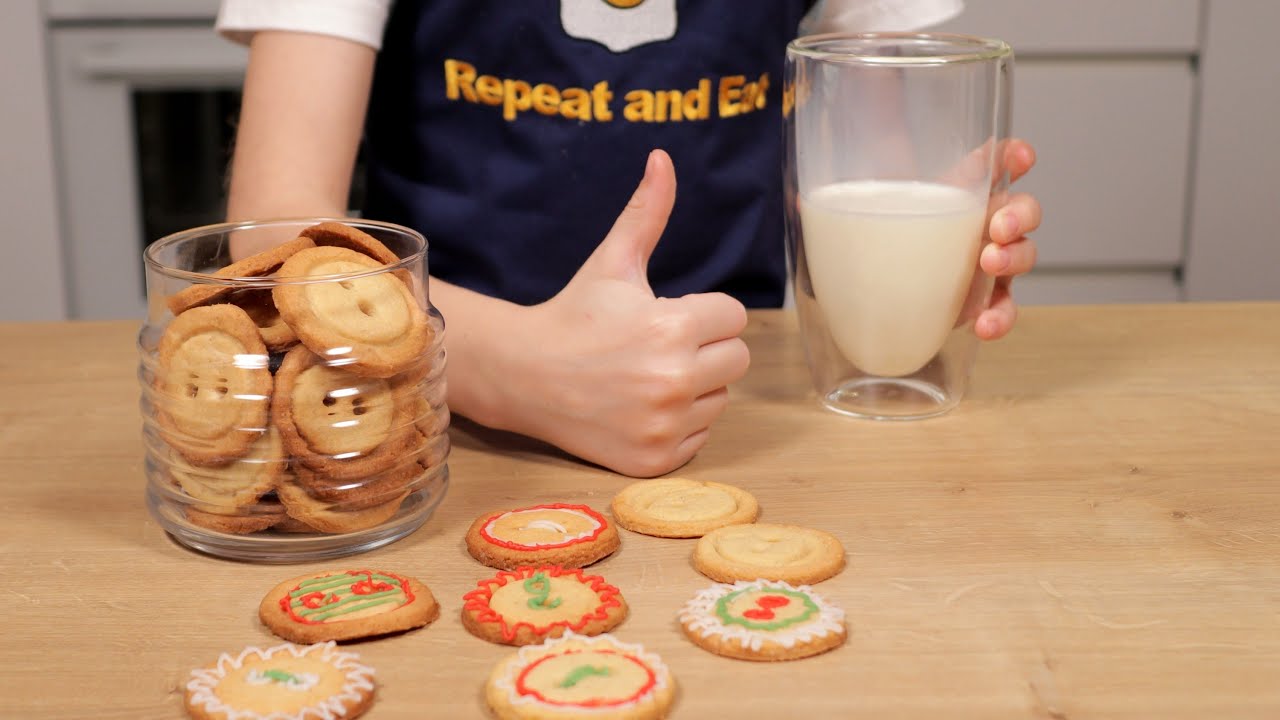
Delightful Button Cookies: Easy Recipe & Tips

Imagine baking a batch of adorable treats that are not only delicious but also visually appealing. These sweet delights are perfect for various occasions, including Christmas, baby showers, and birthdays.
You can easily make these delightful treats at home with a simple sugar cookie dough and basic ingredients. The best part is that they are surprisingly easy to bake and can be customized with different flavors and decorations.
With this easy recipe, you can create beautiful and tasty cookies that will impress your friends and family.
Key Takeaways
- Learn how to make delightful button cookies with an easy recipe.
- Get tips for making perfect button cookies.
- Discover how to customize button cookies for various occasions.
- Understand the basic ingredients required for the recipe.
- Find out how to make your button cookies visually appealing.
What Are Button Cookies?
These charming cookies, known as button cookies, are visually appealing and easy to make at home. Button cookies are sugar cookies that can be customized for various occasions, making them a versatile treat for anyone.
Making button cookies involves creating a simple dough that is then shaped and cut into the distinctive button form. The result is a cookie that is both delicious and adorable.
The Charm of Homemade Button Cookies
Homemade button cookies possess a certain charm that store-bought cookies lack. This charm is partly due to the personal touch and effort put into making them. Here are some reasons why homemade button cookies are special:
- They can be customized with various decorations and flavors.
- Making them can be fun and engaging, especially with family or friends.
- They make thoughtful and personalized gifts for special occasions.
Perfect Occasions for Button Cookies
Button cookies are perfect for a variety of events and celebrations. Initially made for Christmas, they have proven delightful for other occasions such as baby showers and birthdays. You can customize the appearance and flavor of button cookies to fit the theme of your event, making them an excellent choice for:
- Holidays like Christmas, Easter, and Halloween.
- Celebrations such as birthdays, weddings, and baby showers.
- Any gathering where you want to add a touch of homemade charm.
Essential Ingredients for Button Cookies
The foundation of perfect button cookies lies in the quality of the ingredients you use. To make these delightful treats, you’ll need to gather a few basic components for the sugar cookie dough and additional supplies for decoration and finishing.
Basic Sugar Cookie Dough Ingredients
To start, you’ll need the fundamental ingredients for sugar cookie dough: flour, butter, sugar, and eggs. The type and quality of these ingredients can significantly affect the taste and texture of your button cookies. For instance, using high-quality butter will enhance the flavor, while the right amount of flour is crucial for achieving the perfect consistency.
Here’s a breakdown of the basic ingredients you’ll need:
| Ingredient | Purpose |
|---|---|
| Flour | Provides structure |
| Butter | Adds flavor and tenderness |
| Sugar | Adds sweetness |
| Eggs | Binds ingredients together |
Decoration and Finishing Supplies
In addition to the cookie dough ingredients, you’ll need some decoration and finishing supplies. Baker’s twine or thin ribbon is essential for creating the button effect. You can customize your button cookies with various decorations, such as frosting, icing, or sprinkles.
As baking experts note, “The quality of your ingredients and the care with which you decorate your cookies can elevate your button cookies from simple treats to delightful gifts or party favors.”
“The art of baking is not just about following a recipe, it’s about understanding the role of each ingredient and how they come together to create something special.”
You can use refrigerated sugar cookie dough or make your homemade dough. The choice of dough can affect the flavor and texture of your cookies, so consider your preferences when deciding.
Kitchen Tools You’ll Need
The right kitchen equipment makes all the difference in baking brown cookies. You’ll need a combination of essential baking equipment and special tools to achieve the perfect button cookies.
Essential Baking Equipment
You’ll need basic baking tools, such as a baking sheet and parchment paper. A rolling pin is also necessary to roll the sugar cookie dough to the correct thickness.
Parchment paper on your baking sheet ensures that your cookies bake evenly and are easy to remove.
Special Tools for the Button Effect
To create the button effect, you’ll need a few special tools. A shot glass shapes the cookies, while a straw makes the button holes.

Additionally, Baker’s twine or thin ribbon is required to finish the cookies, giving them a charming and authentic button look.
Having the right tools not only makes the baking process easier but also more efficient. With these tools, you’ll be well on your way to creating delightful button cookies that are perfect for any occasion.
Classic Button Cookies Recipe
Now that you have all the necessary ingredients and tools, it’s time to try the classic button cookie recipe. This straightforward recipe yields delicious results with the right techniques.
Sugar Cookie Dough Preparation
To start, you need to prepare the sugar cookie dough. This involves creaming together butter and sugar until light and fluffy, then beating in eggs and vanilla extract. Whisk together flour, baking powder, and salt in a separate bowl. Gradually add the dry ingredients to the wet ingredients until a dough forms.
Chilling the dough for at least 30 minutes allows the flour to hydrate and the butter to firm up. This step makes the dough easier to roll out and helps the cookies retain shape during baking.
Shaping and Cutting the Cookies
Once the dough is ready, roll it to your desired thickness, typically around 1/4 inch. Use a shot glass or a round cookie cutter to cut out the cookies. You can also use other shapes, but round cookies are traditional for button cookies.
Place the cut-out cookies on a baking sheet lined with parchment paper, leaving about 1 inch of space between each cookie to allow for even baking.
Baking Instructions
Preheat your oven to 350℉. Bake the cookies for 6 minutes or just until the edges become golden. Keep an eye on the cookies to prevent overcooking, as the baking time may vary depending on your oven and the size of the cookies.
Here’s a summary of the baking process in a table format:
| Oven Temperature | Baking Time | Cookie Edge Color |
|---|---|---|
| 350℉ | 6 minutes | Golden |

Creating the Button Effect
With just a couple of simple techniques, you can give your cookies the authentic button look that makes them adorable. The process involves a few easy steps that require some basic kitchen tools. To start, you’ll need to press the centers of your cookies to create the button’s flat surface.
Pressing the Centers
To press the centers, use the bottom of a glass. Press down on each cookie’s center to create a slight indentation. This step is crucial as it helps to create a flat surface, mimicking the look of a real button. As “The key to a perfect button cookie lies in the details,” says seasoned bakers, emphasizing the importance of this step.

Making Perfect Button Holes
Once you’ve pressed the centers, creating the button holes takes time. Use a straw to poke two holes in each cookie, ensuring they are evenly spaced and symmetrical. The straw is the perfect tool for this job, creating clean, round holes resembling a button.
Adding Baker’s Twine or Ribbon
After creating the holes, you can add the final touches by threading Baker’s twine or ribbon through the holes. This enhances the button-like appearance and adds a decorative element to your cookies. You can choose colors matching your occasion or preference, making your button cookies unique.
By following these simple steps, you can create button cookies that are not only delicious but also visually appealing. The button effect gives your cookies a charming and distinctive look that will impress.
Button Cookie Variations
Experimenting with different flavors is a great way to give traditional button cookies a unique twist. By changing the ingredients, you can create a variety of flavors to suit any taste.
Peanut Butter Button Cookies
You can use a peanut butter cookie mix as a base to make peanut butter button cookies. This adds a rich, nutty flavor to the classic button cookie. Follow the instructions on the mix, and then proceed with the button cookie shaping and baking process.
Tip: Adding a sprinkle of sea salt to the peanut butter brownie cookies before baking can enhance their flavor.
Chocolate-Covered Button Cookies
For a decadent treat, try making chocolate-covered button cookies. After baking and cooling the cookies, dip them in melted chocolate. Depending on your preference, you can use milk chocolate, dark chocolate, or white chocolate.
Variation: Sprinkle chopped nuts or sprinkles on the chocolate before it hardens for added texture and color.
Greek Yogurt Button Cookies
Greek yogurt button cookies offer a tangy and creamy flavor. To achieve this unique taste, you can incorporate Greek yogurt into the dough. The yogurt adds moisture to the cookies, making them soft and delicious.
Here’s a comparison of the different button cookie variations:
| Variation | Main Ingredient | Flavor Profile |
|---|---|---|
| Peanut Butter Button Cookies | Peanut butter cookie mix | Rich, nutty |
| Chocolate-Covered Button Cookies | Melted chocolate | Decadent, chocolatey |
| Greek Yogurt Button Cookies | Greek yogurt | Tangy, creamy |
You can create a range of button cookie flavors using different ingredients. Whether you prefer peanut butter’s richness, chocolate’s indulgence, or Greek yogurt’s tanginess, there’s a button cookie variation for everyone.

Decorating Your Button Cookies
The fun doesn’t stop at baking; decorating your button cookies is where you can let your creativity shine. With a variety of techniques and materials at your disposal, you can transform your cookies into visually appealing treats that match any occasion or theme.
Frosting and Icing Ideas
One of the most popular ways to decorate button cookies is frosting and icing. You can choose from various colors and consistencies to achieve the desired look. For instance, a thicker icing can create intricate designs, while a thinner frosting can cover the cookie in a smooth layer of color.
Tips for Frosting and Icing:
- Use high-quality frosting and icing for the best results.
- Experiment with different colors and combinations to find the perfect match for your event or theme.
- Consider using a piping bag to create detailed designs and patterns.
Color and Pattern Inspiration
The color and pattern you choose for your button cookies can significantly impact their appearance. You can draw inspiration from the occasion or theme you’re celebrating. For example, pastel colors are often used for baby showers, while bright colors are more suitable for birthday parties.

Seasonal Button Cookie Designs
Seasonal themes offer a wealth of inspiration for decorating button cookies. You can create cookies that fit perfectly with the time of year using relevant colors and decorations. For instance, red and green are classic colors for Christmas, while orange and black are often used for Halloween.
| Season | Color Scheme | Decoration Ideas |
|---|---|---|
| Christmas | Red, Green, White | Holly leaves, Snowflakes, Santa hats |
| Halloween | Orange, Black, Purple | Jack-o’-lanterns, Ghosts, Bats |
| Easter | Pastel colors | Easter eggs, Bunnies, Flowers |
By incorporating these decorating ideas into your cookie baking, you can create treats that are not only delicious but also visually stunning. Whether celebrating a special occasion or simply wanting to add some fun to your baking, decorating button cookies is a great way to express your creativity.
Pro Tips for Perfect Button Cookies
Mastering a few key techniques is essential to achieving perfect button cookies. Making button cookies can be a fun and rewarding baking project, but it requires attention to detail and some practice to get it just right.
Dough Consistency Secrets
The consistency of your dough is crucial for creating button cookies with the right texture. If the dough is too dry, the cookies may be crumbly; if it’s too wet, they may spread too much during baking. Aim for a firm dough to hold its shape but still yield to pressure. Follow the recipe instructions carefully and adjust the dough consistency to achieve this.
Timing Your Button Impressions
Timing is everything when it comes to making button impressions. You want to press the centers of the cookies when they are still warm and soft from the oven. Typically, this is within 2-3 minutes of removing the cookies from the oven. If you wait too long, the cookies may become too hard, and the impressions may not be as defined.
Preventing Common Mistakes
To avoid common mistakes when making button cookies, follow the instructions carefully and observe the dough’s consistency and timing. Here are some key tips to keep in mind:
- Follow the recipe instructions carefully to ensure the right dough consistency.
- Don’t overbake the cookies – they should be lightly golden around the edges.
- Make button impressions when the cookies are still warm and soft.
You can create beautiful and delicious button cookies by following these tips and practicing your technique. Here’s a summary of the key factors to consider:
| Factor | Importance | Tips |
|---|---|---|
| Dough Consistency | High | Aim for a firm but yielding dough. |
| Timing | High | Make button impressions within 2-3 minutes of baking. |
| Baking Time | Medium | Avoid overbaking – cookies should be lightly golden. |
Storing and Preserving Your Button Cookies
Proper storage is crucial to maintaining the freshness and quality of your button cookies. Whether you’ve made a batch for a special occasion or just for fun, knowing how to store them correctly will ensure they remain delicious for as long as possible.
Short-Term Storage Solutions
You can keep your button cookies in an airtight container for short-term storage. This method is ideal if you consume the cookies within a few days. Place the cookies in a single layer within the container, ensuring not to overcrowd it. You can also use a bowl with plastic wrap or a lid to keep them fresh. If you’re storing different types of cookies, consider separating them with parchment paper to prevent flavors from mixing.
Freezing Button Cookies
For longer preservation, freezing is an excellent option. Place the button cookies in a single layer on a baking sheet and put them in the freezer until they are frozen solid. Then, transfer them to an airtight container or a freezer-safe bag. When ready to enjoy them, thaw at room temperature or warm them slightly in the oven. Mix the cookies with a beaten egg-based glaze before freezing for added flavor. Store them in airtight containers or bags labeled with the date and contents, like you would store items in measuring cups or a mixing bowl.
Serving Suggestions and Gift Ideas
Button cookies make a wonderful gift or dessert for any special event. You can serve them at various gatherings, such as weddings, baby showers, or holiday parties, and they are sure to impress your guests with their delicious taste and charming appearance.
These cookies can be customized to fit the theme of your event by using different colors and decorations, making them a versatile treat for any occasion.
Button Cookies for Special Events
Button cookies are perfect for serving at special events. Using different colors and decorations, you can customize them to fit the event’s theme. For instance, you can use red and green frosting for a Christmas theme or pastel colors for a baby shower.
Packaging Button Cookies as Gifts
To make your button cookies an even more thoughtful gift, you can package them in decorative tins or jars. Adding a personal touch, such as a ribbon or a gift tag, can make the gift even more special. Following a simple recipe, you can create a lovely treat perfect for sharing with friends and family.
Conclusion
You can create beautiful button cookies perfect for any occasion with a few basic ingredients and tools. The process is easy to follow, and the result is delicious and visually appealing.
You now know how to make these delightful cookies at home. Whether you’re baking for a special event or want to enjoy a sweet treat, button cookies are a great choice. They’re also wonderful gifts, filled with love and care.
We hope you enjoy making and savoring these delightful treats. Happy baking!
FAQ
What is the ideal consistency for sugar cookie dough when making button cookies?
The dough should be firm enough to hold its shape but still be pliable. If it’s too soft, it may be difficult to create the button effect, while dough that’s too hard can be challenging to shape and cut.
How do I achieve the perfect button holes in my cookies?
To create perfect button holes, use a straw or a small round object to press holes in the center of your cookies before baking. Make sure to press firmly but gently to avoid tearing the dough.
Can I freeze button cookies, and if so, how?
Yes, you can freeze button cookies. To do so, place them in an airtight container or freezer bag, separating layers with parchment paper to prevent sticking. Frozen cookies can be stored for up to three months.
What are some creative ways to decorate button cookies?
You can decorate button cookies with frosting, icing, or glazes in various colors and patterns. Consider adding sprinkles, edible glitter, or other toppings to give your cookies a personalized touch.
How long do button cookies stay fresh, and how should they be stored?
Button cookies typically stay fresh for up to five days when stored in an airtight container at room temperature. To maintain freshness, you can also store them in the refrigerator or freezer.
Can I customize button cookies for special occasions or events?
Absolutely! Button cookies can be customized with various flavors, colors, and decorations to suit different occasions, such as weddings, holidays, or birthday parties.
What type of flour is best for making button cookies?
All-purpose flour is the most commonly used flour for making button cookies, as it provides a balanced texture and structure.
How do I prevent my button cookies from becoming too dark or overcooked?
To prevent overcooking, keep an eye on your cookies while they’re baking, and remove them from the oven when they’re lightly golden around the edges. You can also rotate the baking sheet halfway through the baking time to ensure even cooking.

Delightful Button Cookies: Easy Recipe & Tips
- Total Time: 56 minutes
- Yield: 24–30 cookies 1x
- Diet: Vegetarian
Description
Delightful Button Cookies are charming sugar cookies shaped and decorated like buttons. They are perfect for holidays, baby showers, birthdays, or DIY edible gifts. Their fun shape, soft texture, and customizable designs offer a tasty treat and a creative baking project.
Ingredients
For the Dough:
2 ½ cups all-purpose flour
1 cup unsalted butter, softened
¾ cup granulated sugar
1 large egg
1 tsp vanilla extract
½ tsp baking powder
¼ tsp salt
For Decoration:
Baker’s twine or thin ribbon (optional, for threading)
Food coloring or icing (optional)
Sprinkles or edible glitter (optional)
For Button Design:
Shot glass or round cutter (for shaping)
Straw (for holes)
Instructions
-
In a bowl, cream together butter and sugar until light and fluffy.
-
Beat in the egg and vanilla extract.
-
In a separate bowl, mix flour, baking powder, and salt. Gradually combine with wet ingredients to form dough.
-
Chill the dough for 30 minutes.
-
Preheat oven to 350°F (175°C). Line a baking sheet with parchment paper.
-
Roll dough to ¼ inch thick. Cut round shapes using a shot glass or cookie cutter.
-
Use the bottom of a glass to lightly indent the center. Using a straw, create two or four holes to mimic buttonholes.
-
Place on a baking sheet and bake for about 6 minutes, until edges are lightly golden.
-
Let cookies cool. Optionally, decorate with icing, sprinkles, or thread ribbon through holes.
Notes
Make button impressions while cookies are warm for the best definition.
Dough should be firm but pliable. Chill if too soft.
Add color with frosting or food coloring to match party themes.
For gifting, pack in decorative tins or jars with a tag.
- Prep Time: 20 minutes (plus 30 minutes chilling)
- Cook Time: 6 minutes
- Category: Dessert / Holiday Cookie
- Method: Baking
- Cuisine: American
What Are Our Readers Saying?
There are no reviews yet. Be the first one to write one.


